What is a Moderator and how does it work?
WorkCast Producer users will receive moderator rights upon connecting in the My Connections pod. This provides them with access controls other users do not have and allows them full control over the event:
Moderator users can:
- Grant Moderator Rights to another presenter / producer (they will also keep moderator rights).
- Mute the mic of presenters - This can be 1 specific presenter, all but 1 specific presenter or all presenters.
- Hide the webcam of presenters - This can be 1 specific presenter, all but 1 specific presenter or all presenters.
- Kick out presenters - This removes them from being connected in the My Connections pod and as a result, removes them from the live event itself.
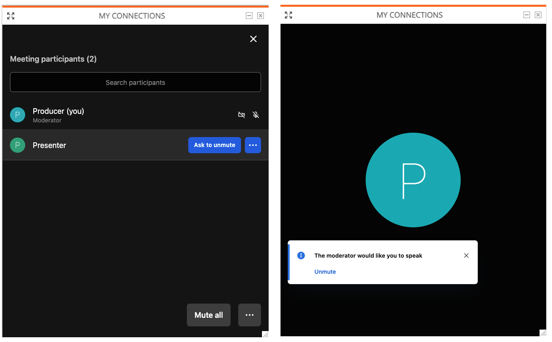
- Ask to unmute - Give presenters a prompt to unmute themselves to speak next during your event.
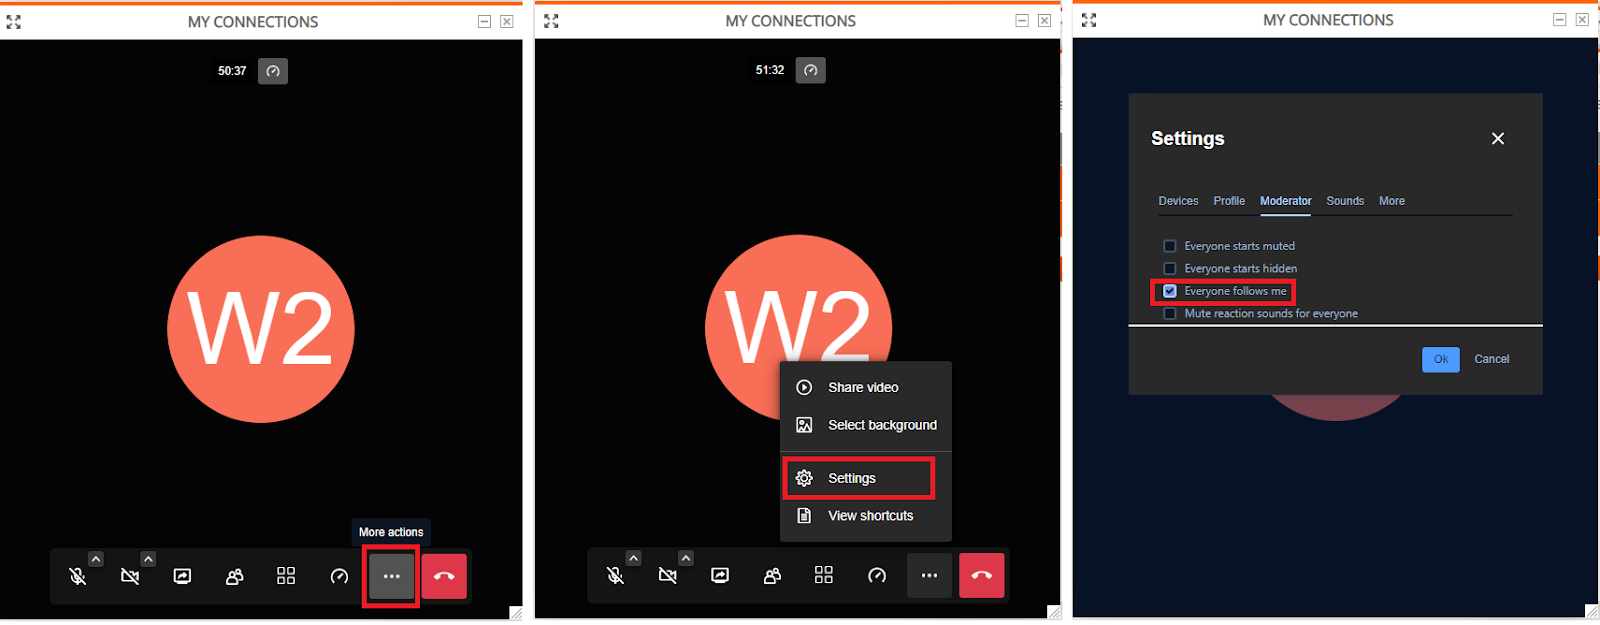
- ‘Everyone follows me’ - Only 1 moderator can activate this at any time, this feature allows you to vision mix and control visually what the audience see.
How to know who has Moderator rights
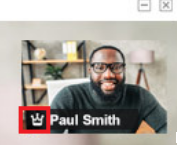
If all webcams are active, the person with Moderator rights will have a crown/'M' icon displayed within their thumbnail / webcam image to the left of their name.
If you cannot see this on any of the webcams displayed or all webcams are hidden click the Participants option from the My Connections control bar. A side bar will appear showing who is connected in the my connections pod and the word ‘Moderator’ will show under the name of the person with Moderator rights.

Granting Moderator rights
Need more than one participant to have Moderator rights? Did your presenter log into my connections before you did? No problem! More than 1 person can have moderator rights and granting these to another user is easy!
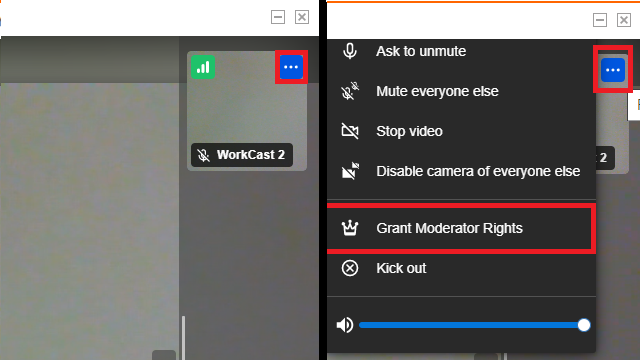
- The webcam is active - Locate and hover your mouse over the user's webcam image located in the right of My Connections pod. Click the blue box with three dots in the top right of their webcam tile which will then provide you with a drop down menu. Select “Grant Moderator Rights” from the menu.
- The webcam is inactive - Click the Participants icon from the My Connections control bar. In the participants list hover over the user’s name and click the blue box with three dots. In the drop down menu select “Grant Moderator Rights”

There is no limit to the number of users with Moderator rights however we’d recommend this is given only to those who will be producing the event.
Mute 1 or multiple presenters
Sometimes presenters can forget to mute themselves causing background noise you’d prefer your audience not to hear. With Moderator rights you have the ability to control the audio going out to your audience by Muting any participant’s microphone with a click of a button.
The easiest way to do this is using the Participants icon within the My connections control bar. In here you can see all studio users connected within My Connections.
You can then select to Mute all participants or you can hover over a specific user and click the blue Mute button to the right of their name. You could also click the blue three dots and Mute everyone else but for that specific user.
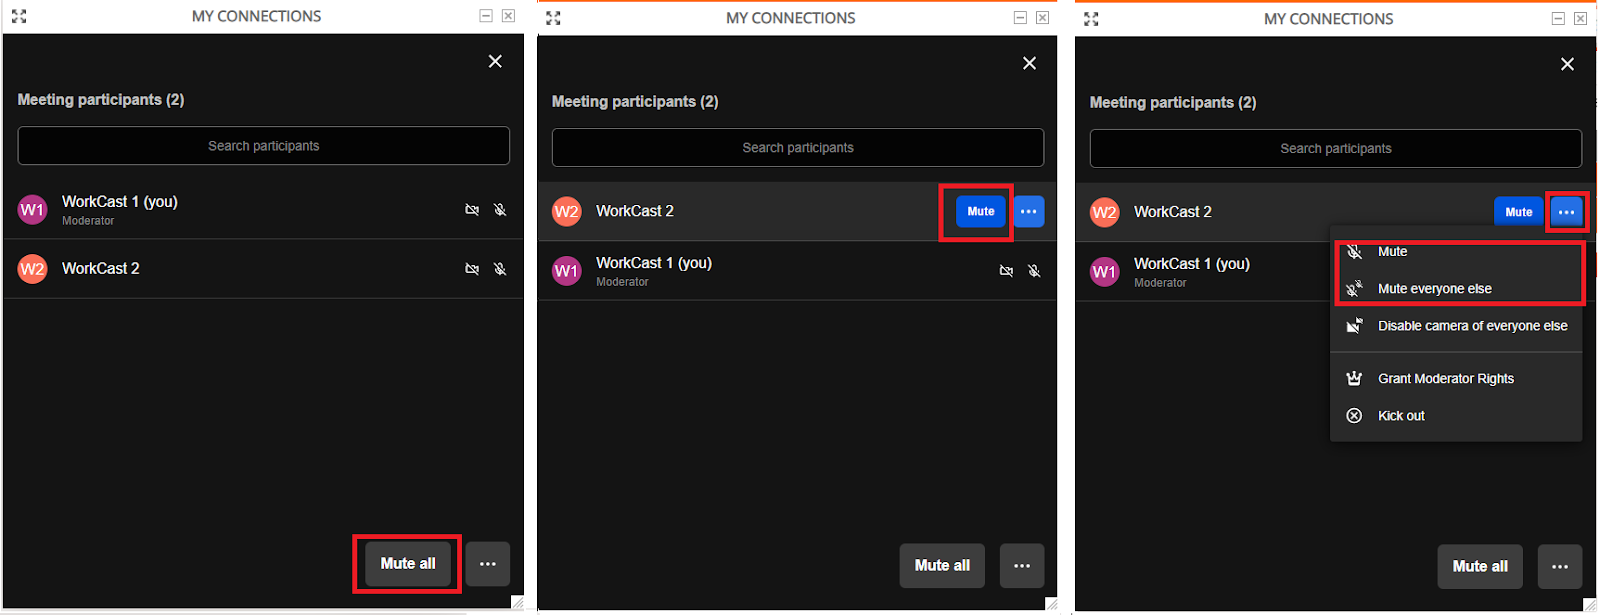
Please note, the user would need to unmute themselves, however you can prompt them to do this by clicking the 'Ask to unmute' button within the participants list which will send a prompt to the specific user.

Hide the webcam of 1 or multiple presenters
Sometimes presenters can forget to hide their webcam causing their image to show in view when you’d planned for them to be hidden. With Moderator rights you have the ability to control the visual going out to your audience by ‘stopping’ a presenter's webcam with a click of a button. (Please note, the user would need to unhide themselves).
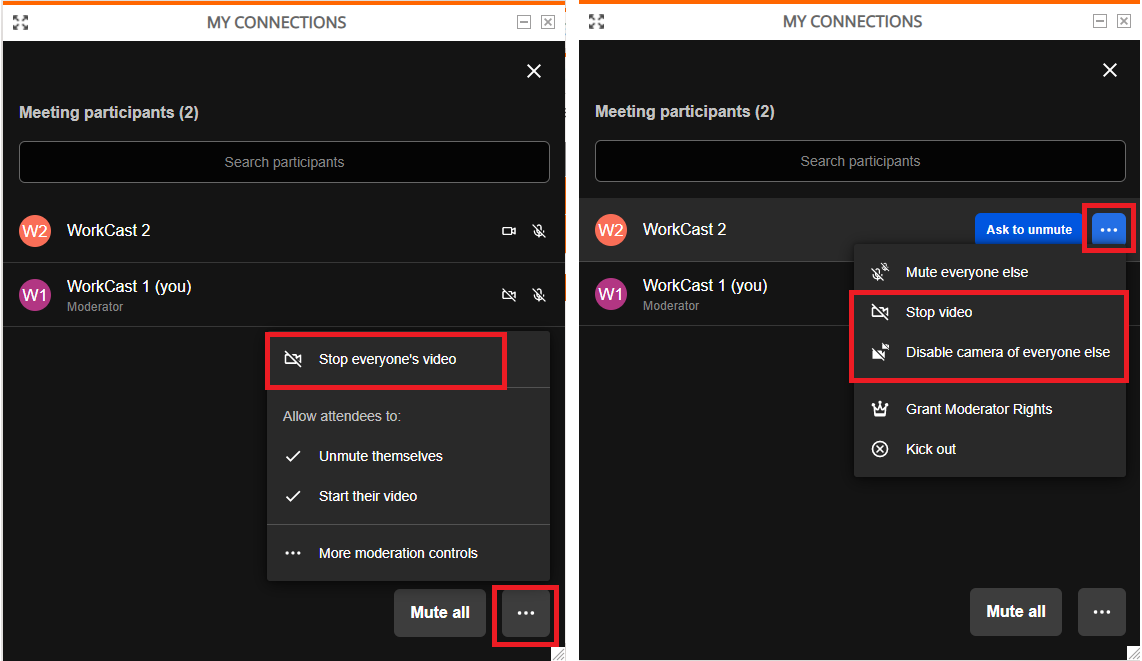
The easiest way to do this is using the Participants icon within the My connections control bar. In here you can see all studio users connected within My Connections.
You can then select to ‘Stop everyone’s video’ by clicking the three dots to the bottom right of the participants list. You could also hover over a specific user and click the blue three dots and select ‘Stop video’ of that specific presenter or ‘Disable camera of everyone else’ but that specific user’s.
Kick out presenters
Sometimes a presenter may join the My Connections pod twice in different browsers or tabs and find it difficult to locate that tab/window. The Kick out function allows you to control who is connected to your webinar and to disconnect any participant you’d like to.
To do this click the Participants icon from the My Connections control bar to show the participant list. From the list locate the user you’d like to disconnect and select the blue button with three dots. In the drop down list click ‘Kick out’.

Ask to unmute
Moderators can prompt presenters to unmute themselves, but cannot unmute presenters.
To do this click the Participants icon from the My Connections control bar to show the participant list. From the list locate the user you’d like to prompt to unmute and clicl Ask to unmute. The presenter will get a prompt that you would like them to speak and will be able to click to unmute on the pop-up.
Follow Me
Moderators also have the ability to control the studio and audience view using Follow me. (Please note, only one moderator can activate follow me at any time)
Follow me allows you to control the view within the my connections pod but also the auditorium media window (attendee view). If you have Moderator rights with Follow me enabled what you see in your My Connections pod is what your presenters and audience will see. This is particularly important when you’d like to:
- Hide presenter thumbnails from view when sharing slides/ media or when you’d like only the person speaking to on screen. (Note this is determined by voice auto recognition.)
- Change from Speaker / Presenter view to Tile view so all webcams are visible on screen.
- Click to pin a presenter's webcam to full screen meaning they will always be in the main view while others remain in thumbnails to the right of the screen.
To activate Follow me click the three dots (More Options) in the My Connections control bar and select Settings. If you have moderator rights you will see the ‘Moderator’ tab. Check the box next to 'Everyone follows me'.
Once Activated:
Hide thumbnails - To hide / unhide the thumbnail camera images, click the arrow located to the middle right of my connections. The bar will disappear from you, your presenters and your audience view.

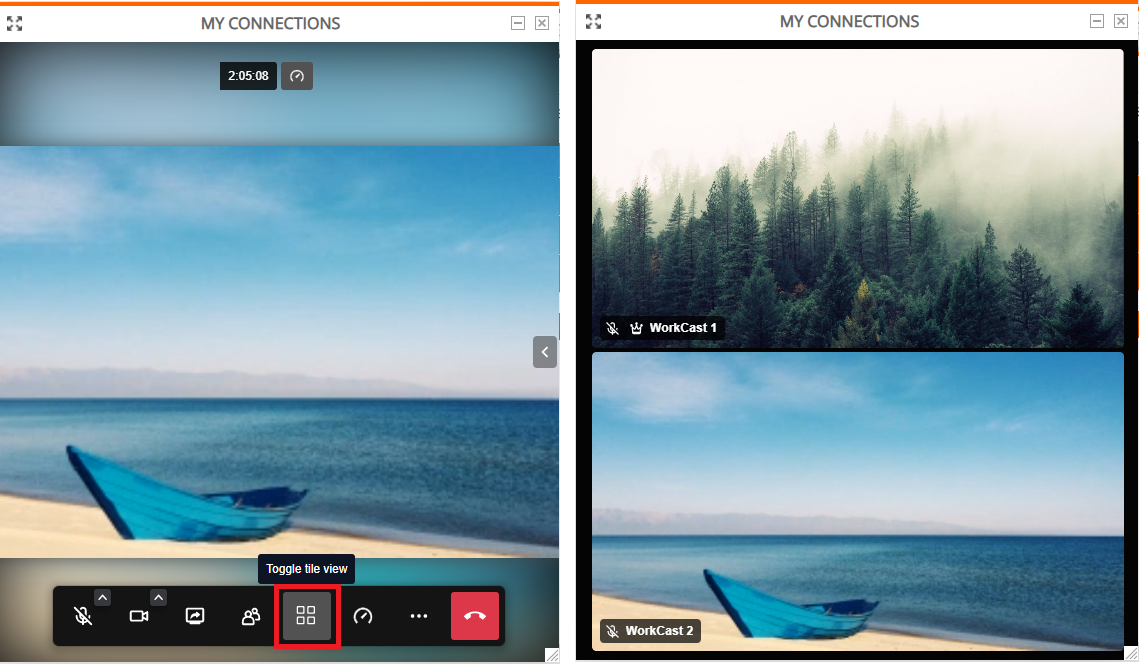
Activate Tile View - Show all presenter webcam’s on screen using Tile view by clicking the Toggle Tile view icon.
You and your audience will now see all presenters with active webcams on screen.

Pin - You can pin a presenter or a screenshare tile to appear full screen by clicking on the thumbnail. You can see which thumbnail is pinned by the pin icon showing to the top left.

For a smoother transition between presenter images and views, keyboard shortcuts can be used.
Examples of how your event could use the follow me feature:
Thumbnails hidden - This can be on default speaker view, when screensharing and/ or when playing out media using Share a video.

Tile view

Should a presenter wish to hide their webcam the My Connections pod will automatically alter the view to show only those with active webcams.
