Quick Links
How to create a simulive event
Adding media to your simulive event
Adding polls to your simulive event
What is a simulive event?
A simulive event is a WorkCast presentation type which allows you to broadcast out pre-recorded media as if live at a date and time of your choosing. The broadcast is completely automatic meaning that the media will begin to play at the scheduled start time and will end once the media has played out in full without the need of a producer controlling this.
In short, once the event is created you can sit back and relax in the knowledge that the live broadcast is taken care of!
Example:
- You create your simulive event within your WorkCast account for the 19th December at 16:00 GMT and add in all content.
- You uploaded a 45 minute MP4 recording to the account and attached this to the Media tab within the event.
- At 16:00 GMT on the 19th December your media will broadcast automatically in the event auditorium
- At 16:45 GMT the media will automatically end.
SImulive is now only available as full media playback with no live elements. If you want to include video playback with a live intro or Q&A then we recommend using our interactive studio.
How to create a simulive event.
Within your account navigate to the Create Events tab and choose the event template you’d like to use.
In the pop up enter the event title, the date of the event, the time you’d like it to start and the duration before finally the timezone. On the next page choose simulive as your presentation type.

When the event is created the page will reload to the below ready for you to add in your content.

For help adding content to your registration and auditorium pages and more please click here.
To include Poll questions please click here
Adding media to your Simulive event
Recommendation: We recommend you add a slide with no audio at the beginning and the end of your recording for up to 30 -60 seconds. The reason for this is there is a slight delay between the broadcast starting in the studio to reaching the attendee auditorium. This ensures no attendee misses the introduction or the end of the event due to any lags on their browser stream.
Note: To add media to a simulive event you first need to upload this to the Media section of the account.
To understand how to do this and the media requirements please click here.
If you are recording your MP4 media outside of the WorkCast platform eg. Microsoft PowerPoint, please check our MP4 requirements.
Navigate to the Session Setup & Studio Access tab. In here select the Media tab and click Choose Existing

A pop up will appear where you are then able to search the account for the uploaded media. You can choose to enter the title or you can click the search button which will show a list of all available media in the account to choose from.
To ensure optimal playback quality and compatibility, we recommend attaching your media at least one hour in advance.
This gives platform encoding time to convert it into the best formats for optimum playback.

Click the checkbox to the left of the media you’d like to attach and click Add selected.
While your media is processing and re-encoding you will see a processing icon in the Media tab of your event.

Once processed and re-encoded this will change to a green circle with a white tick.

Your simulive event is now created!
Adding polls to your simulive event
Simulive currently uses classic polls where the poll will show as pop-up over the media.
Poll questions, when attached to a simulive event are automatically pushed to attendees at a specific time during the media playback. For this reason, poll questions are associated with the media attached to the event and not the overall event itself. Should you change the media attached to the simulive event you will need to re-add the poll questions into the event setup.
Got to Session Setup & Studio Access and click on Features.
You will see the Add Polls section where you can add your simulive polls.

When adding polls to a simulive event you will see the below:
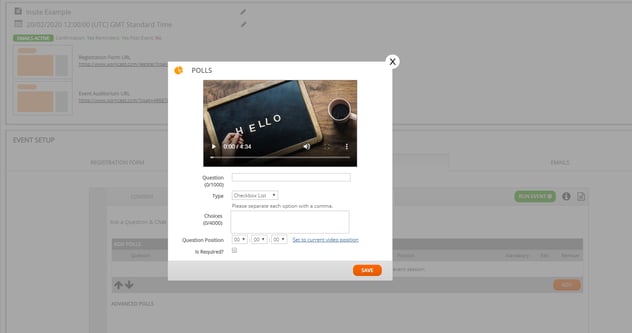
Once you’ve entered the question, type of question and added the answers to choose from you can then select where in the media the poll will push out to attendees. Once happy with the time click save.