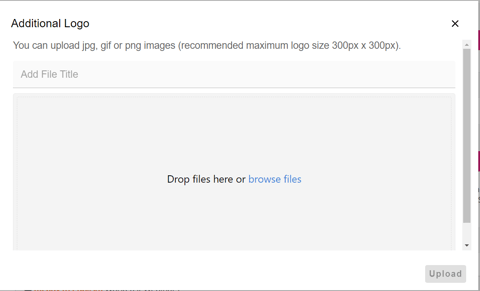
Sizing: 300 pixels X 300 pixels Max
Recommended: 250 pixels in width, and no more than 150 pixels in height
File type: JPEG / PNG / GIF
Logo Upload
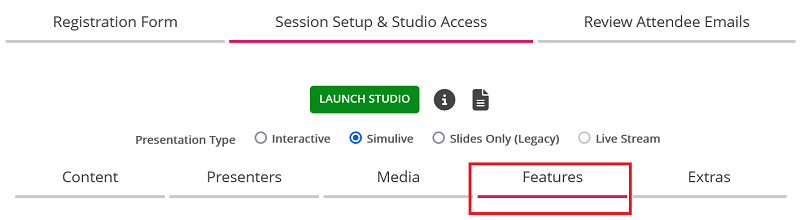
First, you would need to click into your Event within the platform > Session Setup & Studio Access > Features
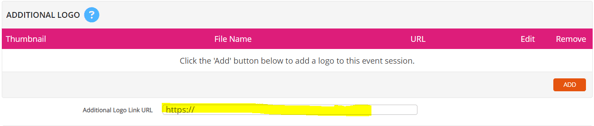
Then, scroll down to the Additional Logo section
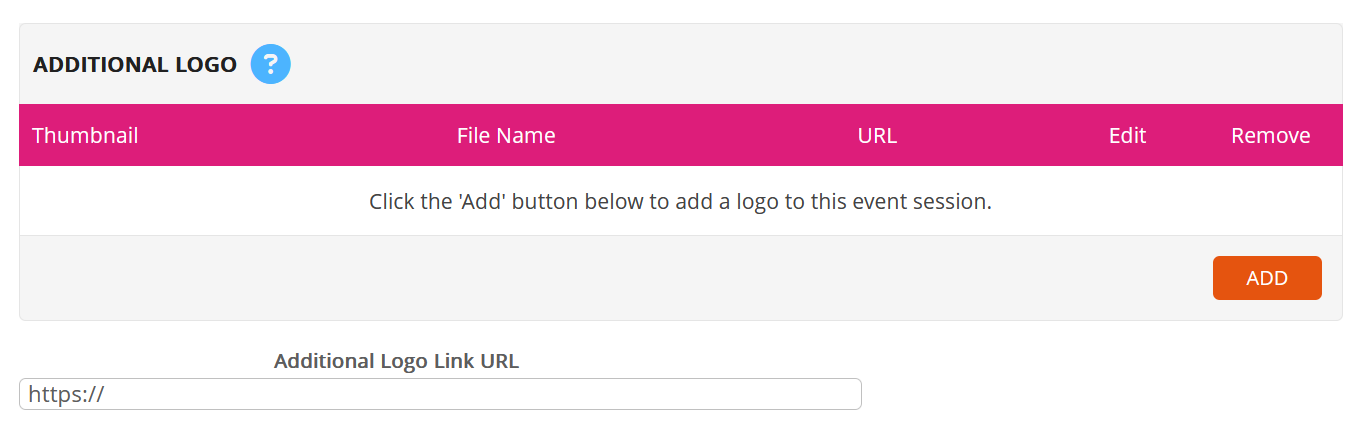
This is where you can add a secondary/ Sponsor logo to your event, which will show on the following pages:
- Registration page
- Register thanks page
- Auditorium Page
- Confirmation/Reminder/Post emails
Note: Your company Logo is usually hardcoded into the template, so this Additional Logo is for a secondary logo, such as a sponsor logo.
Click the Add button to add your logo.
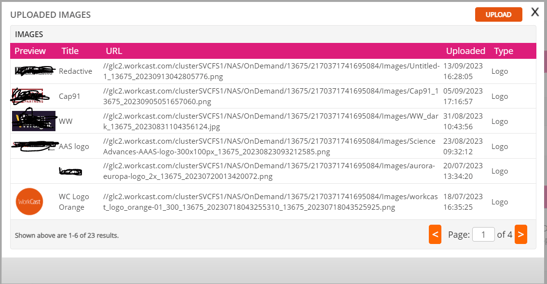
Here you can chose from a logo already uploaded to your WorkCast Account or click the Upload to upload a new logo.
Here you will see the file type you can upload with the file size. Add a Title and then select browse files to select the logo you'd like to upload.
The Additional Logo Link URL is what you would like your secondary logo to link to, so this is usually where you enter the sponsors company website URL.
This will link on the Registration page, Register Thanks page and Auditorium event page. No logos urls will link on the Confirmation/Reminder/Post emails.

Next steps on finalizing the build of your event.. Uploading a splash image (Media holding image)