Quick links
How to login to the WorkCast Slides Only Studio
How to login to the WorkCast Slides Only Studio
You would have been sent a URL or a URL with a username and password. This may have been directly from WorkCast or by the organisation hosting the event.
If you have been given a URL:
Click the studio URL in the WorkCast email, in your saved calendar entry for your event or on the details from the organisation hosting the event. This should take you directly into the WorkCast Studio with no additional details needed.

If you have been given a URL with a username and password:
Click the studio URL provided to you by the organisation hosting the event. This will open to the below:

Enter the Username and password provided. (Please ensure there are no spaces before or after)
The webpage will then reload to the WorkCast Classic studio as shown below, where upon first entry you will see the Pod options menu bar to the left of your screen, with the Media hub Pod and the Presenter Only chat pod activated, open and in view.

Note: All pods within the studio are re-sizable. To do this click the bottom right of the pod and drag to the size which best suits you.
Pod options menu
Located to the left of your studio view, here you can choose the pods you'd like to activate within your WorkCast Studio view.
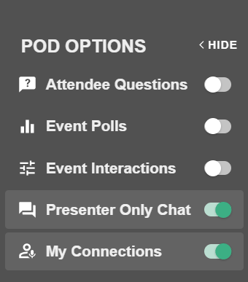
To activate a pod click the toggle to the right of the pod name. This will change to green indicating it is activated.
The pod will then show in the main studio window, click the + icon to open this into view.

If you’d like to remove a pod from view, click the toggle again or X on the pod.
Media Hub pod
The Media Hub is the main presenting pod in the Classic WorkCast studio. This is where you will see and control your cloud slides and connect your microphone.
The two tabs you will use within the Media Hub pod are Present and My Connections.
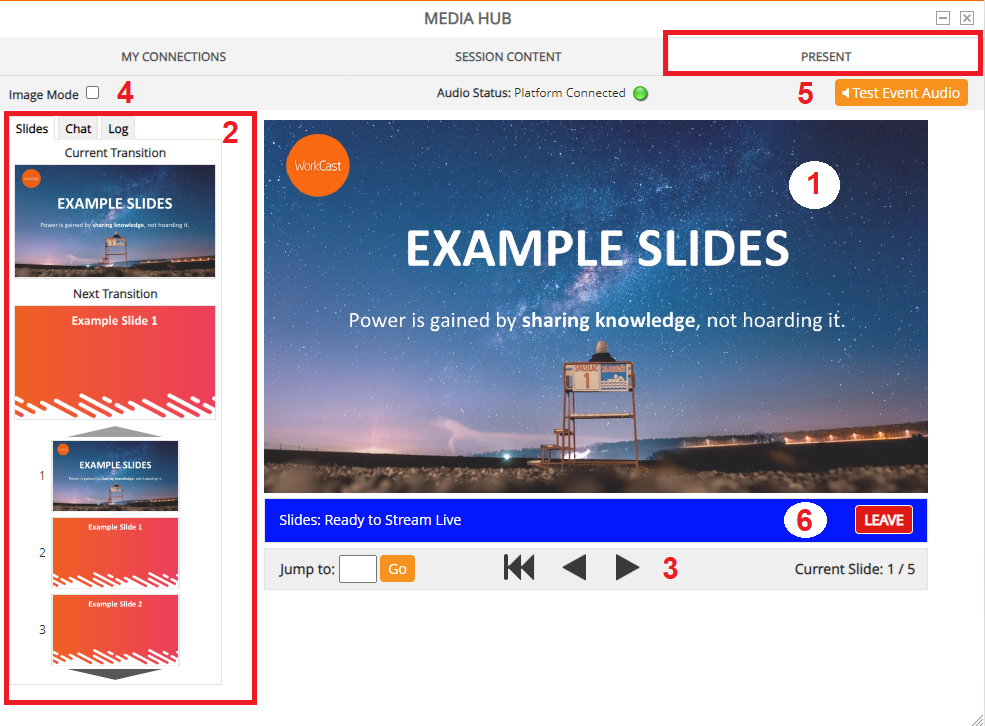
Present tab
Here you can view the slides attached to the event.

Here you will see either:
-
A red bar with an orange Start button which indicates that the slides have not yet been loaded
-
A blue bar with an orange Join button which indicates another user has loaded the slides and you can join to view them.
Please click Start or Join to see the slides.
Note: Depending on the file size and your local connection the slides can take a few minutes to load.
Once the slides have loaded you will see the below:
-
This is the media window where your slides will show ready to present from.
-
This shows thumbnail images of the slides indicating the current slide and upcoming slides.
-
This is the slide control bar. Here you can advance the slides using the arrows, jump to a specific slide by number and see which slide is currently showing in the main window. The buttons will turn green when you first click on them to show they are active. When green, you are able to use the left and right keys on your keyboard to transition (a clicker can also be used).
-
Image Mode - This allows you to see static images of the slides without animations or video in the main window. Useful if you experience poor local connectivity as this typically uses less bandwidth.
-
Test Audio - this allows you to hear any videos within the studio. Please note, you must stop the Test audio when you are unmuted or an echo will be heard by the attendees.
-
Leave - When the broadcast has ended you can leave the slides by clicking this button.
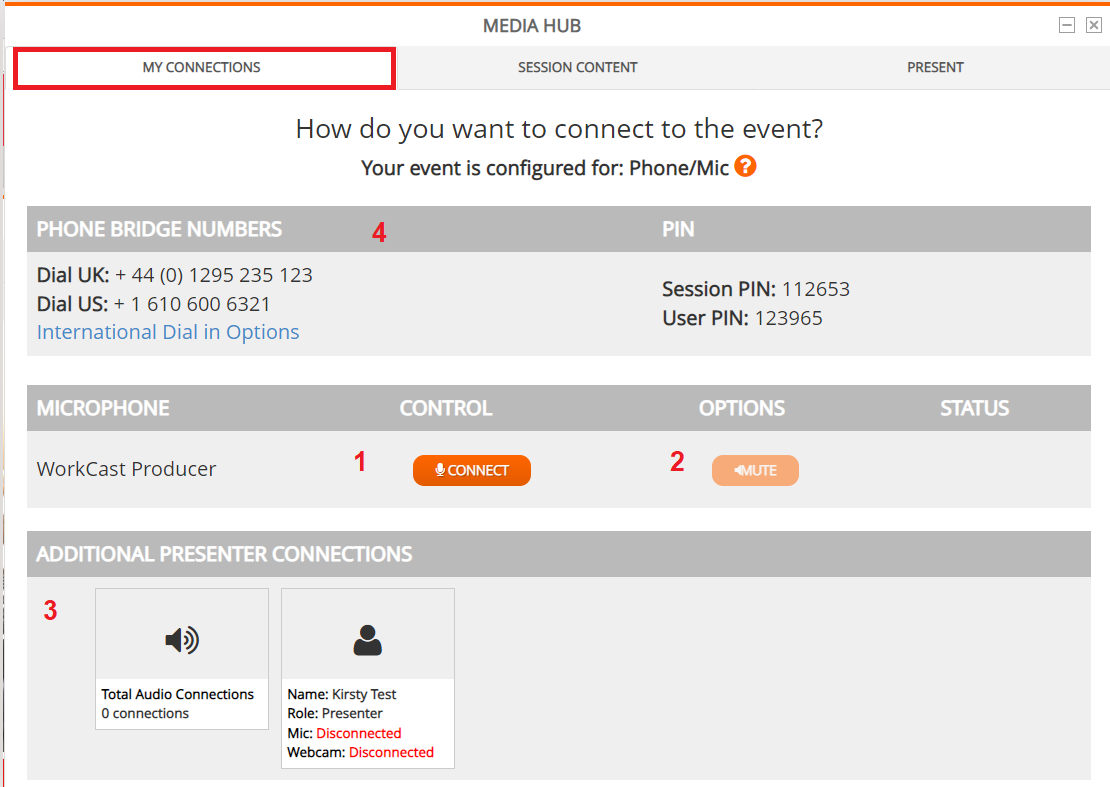
My Connections tab
This is where you connect and mute your microphone.
-
Connect - To connect to the audio bridge click this, you will be heard by all other presenters who are connected and the attendees when broadcasting.
-
Mute - Click this to mute / unmute your microphone.
-
Here you can see who is available in the studio and their connection status. Mic will show Connected for all who have connected their audio.
-
Dial in - If you are unable to connect via your device microphone you are able to dial into the audio bridge using the dial in number available in this section, using the session pin and user pin to gain access.
Presenter Only Chat
Presenter Only Chat pod allows you to see who is available within the studio (View Presenters tab) and also to communicate with Producers and presenters within the studio (Chats tab).
Attendee’s cannot see this chat.

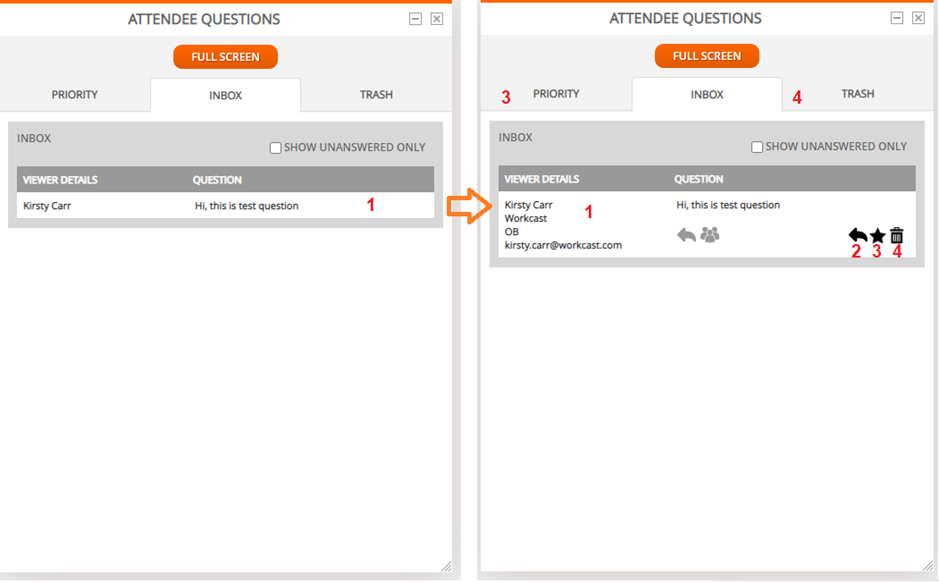
Attendee Questions Pod
If your event is set up for attendee’s to ‘Ask a question’ you will have Attendee Questions pod available in the above list. In this pod you will see three tabs.
Priority – this is where you can sort the attendee questions you think most important.
Inbox – this is where all attendee questions will populate. (This is the tab which the pod will open to)
Trash – you can delete any question you don’t believe is relevant
-
Your attendee questions will appear in the inbox. To see the full question and the options click on the question.
-
To replay click this icon. A window will appear where you can choose to reply privately or publicly. (Note: if you click to reply publicly all attendees in the auditorium will see the question and the response.)
-
If you’d like to Prioritize a question, click this star icon. This will then move to the Priority list accessible by the priority tab.
-
If you’d like to delete a question, click this trash icon. This will then move to the trash tab. You can empty this tab by clicking the ‘Empty trash’ button if you’d like.
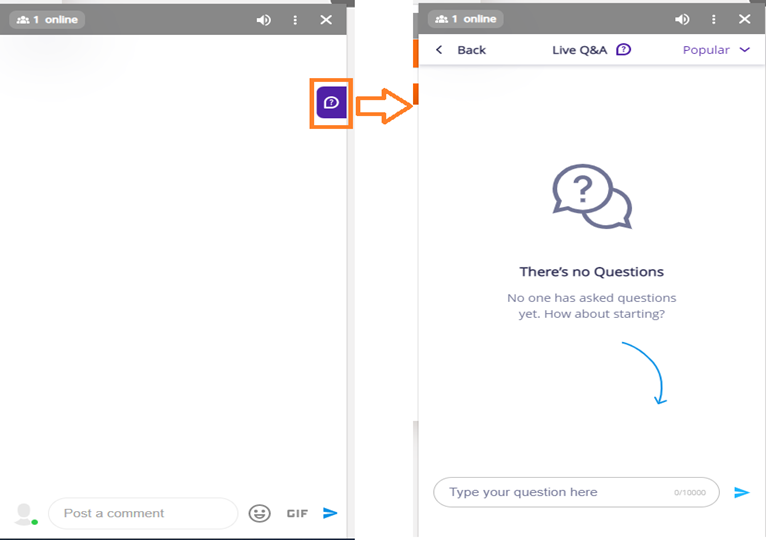
Engagement Wall
If your event is set up to have Engagement wall it will appear to the right of the screen and open automatically upon accessing the studio. Engagement wall allows you to participate in Live Chat with your attendees and Live Q and A. To learn more about engagement wall please click here:
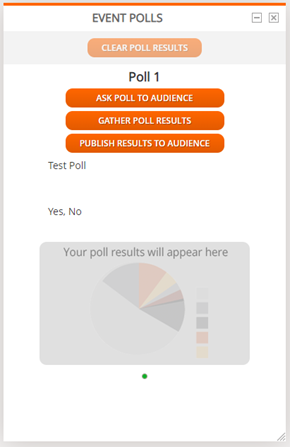
Polls Pod
Questions you’d like to ask your attendees during the event will be loaded into the Polls Pod. Your moderator will likely control this pod however you are able to Ask Poll to Audience, Gather results and Publish these to your audience.
This is where you will view results of any multiple choice or drop down option question within the studio.
Please note: you will not be able to see text based responses within the studio. Instead this will be available in the event reporting which the organisation running the event has access.