WorkCast can support your Live Stream event remotely using additional hardware we are able to provide. This solution works if you have a fully set up video production team already in place and want to use this content to reach a larger audience.
LiveU Solo Streaming Instructions
- Ensure your network infrastructure meets WorkCast minimum requirements. Port 1935 must be open and a minimum speed of 5mbps Up/Down unblocked traffic must be available. The network must also allow for DHCP connectivity. Further information can be found here.
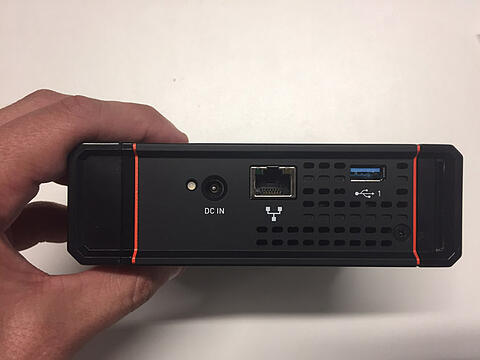
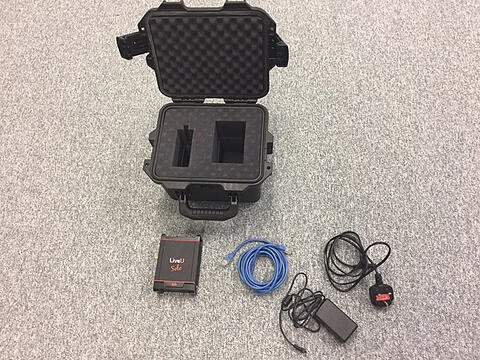
- Plug the LiveU Solo power supply into the DC IN socket to the right of the unit. Plug the unit into your power sockets.
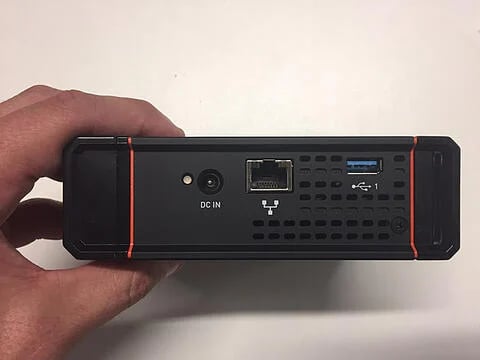
- Connect the supplied network cable to the right of the unit next to the DC IN socket. Connect the other end of the network cable into your internet supply.
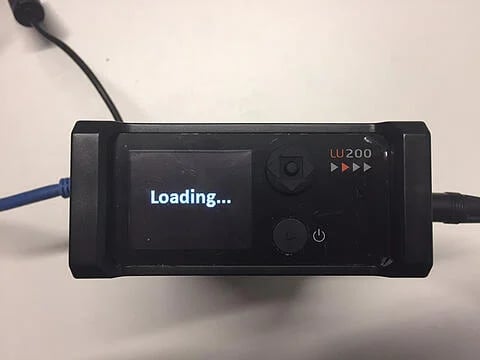
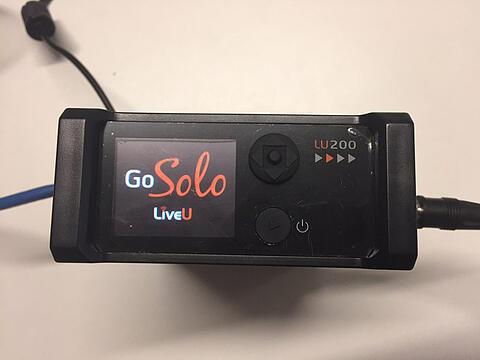
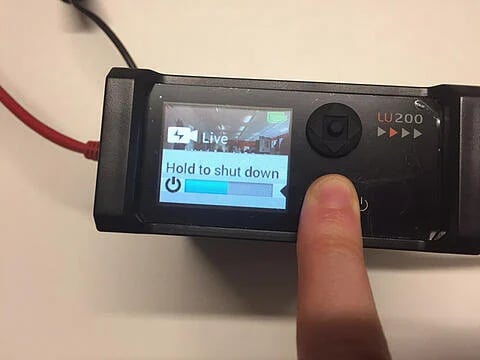
- Power Up the unit by pressing and holding the power button for 3 seconds. The display next to the button will show the word “loading” and the LiveU logo. Once powered up the unit should show the word “Live” on the display. The battery will also be displayed on the screen. The power-up procedure can take up to 3 minutes.
- Connect your video signal by plugging an SDI or HDMI cable into the right side of the unit, as you view it facing the screen. The SDI connection is found beneath the rubber cap. Once connected the unit display will change to show the video signal. The unit should now display as “Ready” on the screen.
.webp?width=480&name=image_9_110717%20(1).webp)
- The unit is now ready for streaming and will be configured if required by the WorkCast support team assigned to your event.
- Please ensure you are also recording a local copy of your program output as a backup recording for the On-Demand replay of the event.
Once your Live Stream has finished:
- Press and hold the power button to power down the unit.
- Disconnect the SDI or HDMI cable.
- Disconnect the power supply and network cable. Pack the unit into the box, together with the power supply, network cable, and these instructions. Please attach the shipping labels and ensure the unit is collected.
- Please send the local recording file to the WorkCast Event Manager contact via an FTP. The file needs to be an .mp4 using H264 Codec at 720p resolution.

Minicaster Streaming Instructions
- Ensure your network infrastructure meets WorkCast minimum requirements. Port 1935 must be open and a minimum speed of 5mbps Up/Down unblocked traffic must be available. The network must also allow for DHCP connectivity. Further information can be found here.
- Open the front and back lids of the case. You will see two Minicaster encoders mounted on one side, along with the network router. The other side will display a 6-way socket bar and the Ethernet connectors that connect to your network supply.
- Plug the 3 large adaptors into the 6-way sockets. Plug the socket bar into your mains supply.
- Plug your DHCP-enabled unblocked connection into the Ethernet connector nearest the 6-way power switch.
- Switch on the 6-way socket bar, three lights (red, green, and amber) should light up next to the on-switch. You will also see the network router power-up.
- Once the router is powered up, you should see the green power light become solid after flashing for a short while. You will also see the Ethernet green light flashing, followed by the Internet light also flashing simultaneously. PLEASE NOTE: The Internet light may flash red initially. It should then change to green.
- Connect the network cables and power cables to each encoder. The network cables plug into the top of each unit (mounted on their side). The power cables plug into the bottom of the unit. These cables push and click into place once you have lined them up correctly.
- Connect the HD-SDI video cable to each encoder. The input connector is found on the bottom of each unit, furthest from the power connector.
- Connect the HD-SDI video cable to each encoder. The input connector is found on the bottom of each unit, furthest from the power connector.
- Once bootup is finished, the encoders will display the message “Start Streaming”. Please contact your Event Manager who can verify the equipment is ready to commence streaming.
Once your Live Stream has finished:
- Press the power button to power down the unit.
- Then press the confirm button (right angle arrow) next to the power button to confirm this command.
- Disconnect the SDI cable.
- Disconnect the power supply and network cable from each encoder.
- Power down the 6-way power socket and disconnect the network cable from the Ethernet connector.
- Once all power down is complete, attach the lids to the box. Please attach the shipping label and ensure the unit is collected by the relevant courier.
We wish you a successful, engaging streamed event.
Equipment Shipping Information:
Box size: 25x20x20cm (10x8x8in) Weight: 5kg / 11lbs Contents: LIVEU Solo SDI Encoder and Power Supply