Multi-registration templates are a paid add-on to your licence. If you want to know more about multi-registration events please reach out to your Account Manager.
Quick Links:
Request multi-registration event creation
Locating your multi-registration URL
The creation of a multi-registration event is done in two stages.
-
Creation of the individual events (Maximum of 6 events)
As each event will have its own auditorium and emails, you will need to create the events separately using your Multi-registration template.
-
Creation of the multi-registration form URL
Currently, this stage requires WorkCast Support assistance.
1 - Creating your individual events
The following process should be repeated for each event you’d like added to the multi-registration page (i.e, if you’d like to include 3 events, you would create and add content to 3 events).
Please note: the registration form fields MUST be the same for each event for reporting purposes.
Click into the Create Events tab within your account and locate your multi-registration template.
Typically, this will have the words Multi reg in the title. For example "Multi reg 2021."
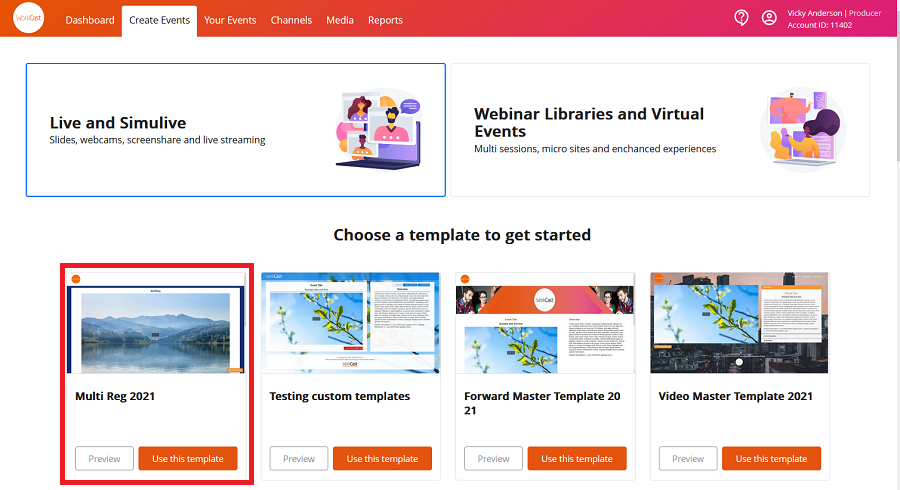
Click Use this template to create the event and fill in the relevant information of your event, including title, date/time and timezone.
In the Event Description box, add the date/time/timezone information that you would like visible in your multi-registration form (e.g. December 25th, 3pm GMT).
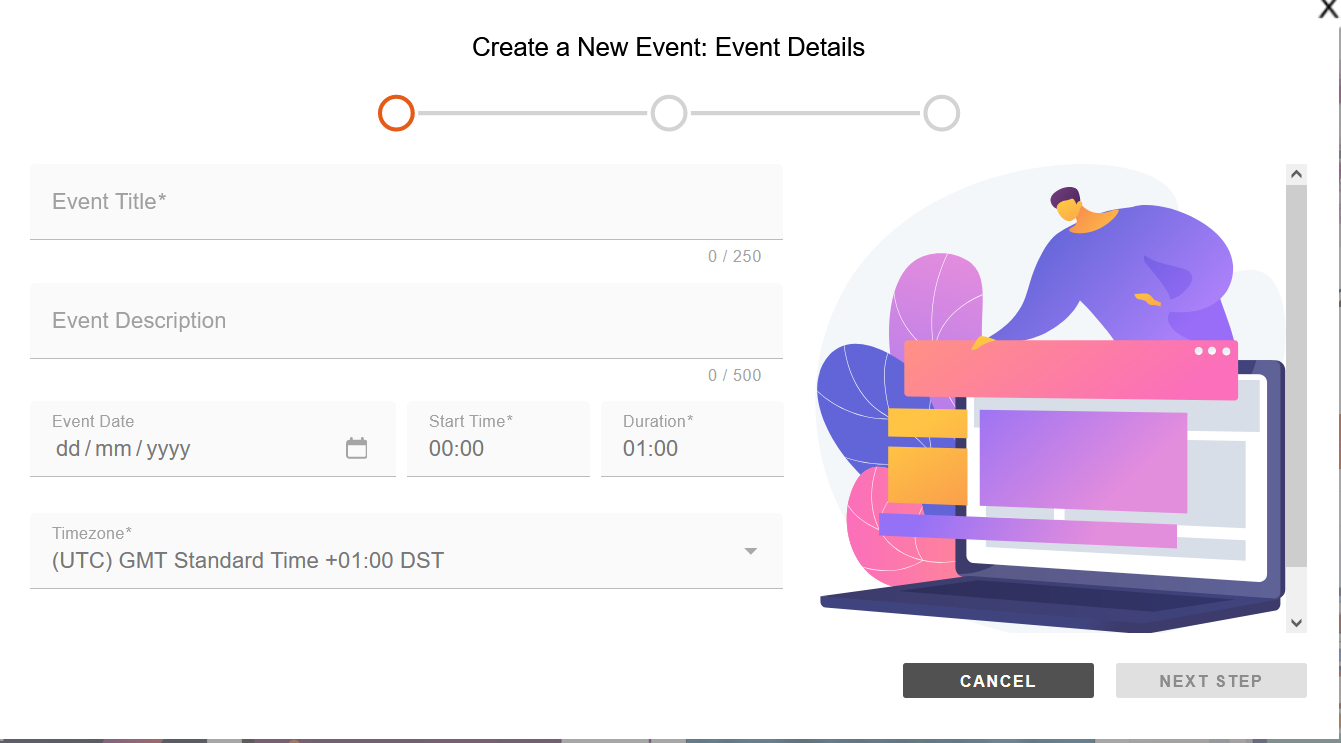
Once complete, click the Next Step.
Here you can choose your event presentation type, i.e Interactive/ Simulive. Once selected, click Next step to check and confirm the summary information before clicking Create Event.

The event is now created in its basic form and ready for you to add content as you would a Standard Event.
For guidance on how to add content to your event click here
We would strongly advise you to finish building all events prior to moving onto step 2.
Once the events are added to the multi-registration event you are able to make, save and publish changes to all except the top event session (event number 1 in your multi-event). To publish the changes on the top session you will need to reach out to Support.
2 - Creation of the Multi registration URL
Once you’ve created and added content to all of your events, email us at support@workcast.com and request that we create the Multi registration URL.
We will need:
-
Titles, dates and times of all events you’ve created and would like added to the over all multi-registration event.
-
A title for the overall event - this will display to the very top of the registration form.
The support team will then create the multi-registration URL for you and reach out once this is complete.
Your multi-registration page is now built and can be marketed to your intended audience.
Locating your multi-registration URL
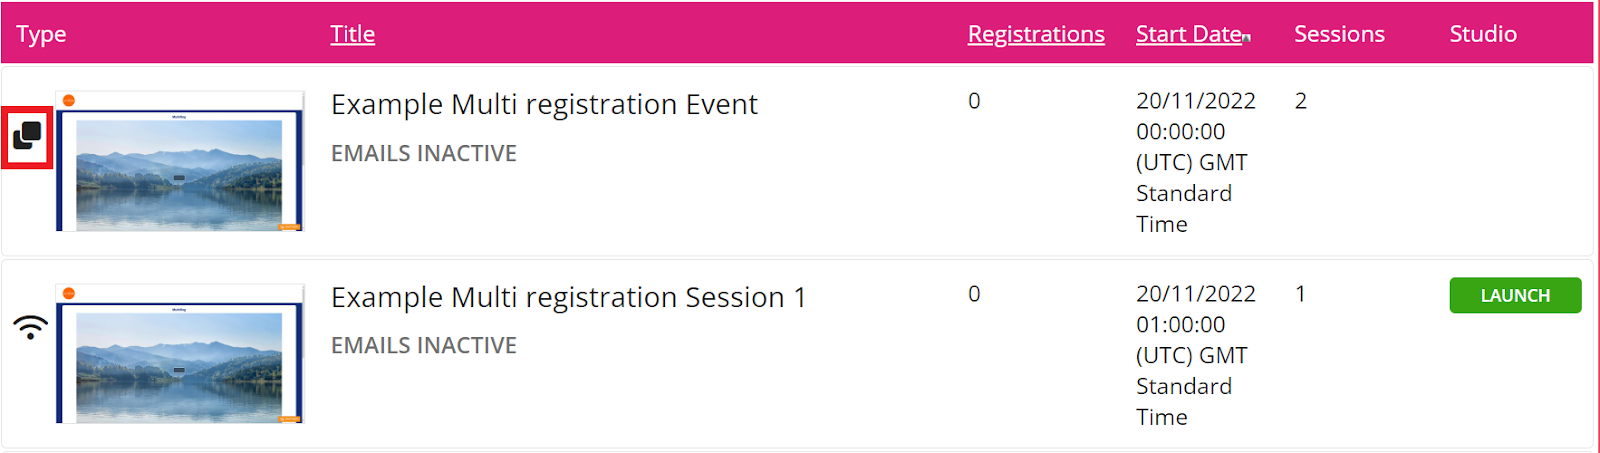
To create the multi-registration URL the support team will have created a multi-session event within your account.
This session will have the overall event title provided and will be scheduled on the same date as the first event with the time set for 00:00UTC.
To locate this event:
Click into the Your Events tab and search the date of the first event.
Multi-session events within the WorkCast Platform can be identified by the boxes icon to the left of the thumbnail image.
Click into this event.
Here you will find your multi-registration URL which can be marketed to your prospective audience.
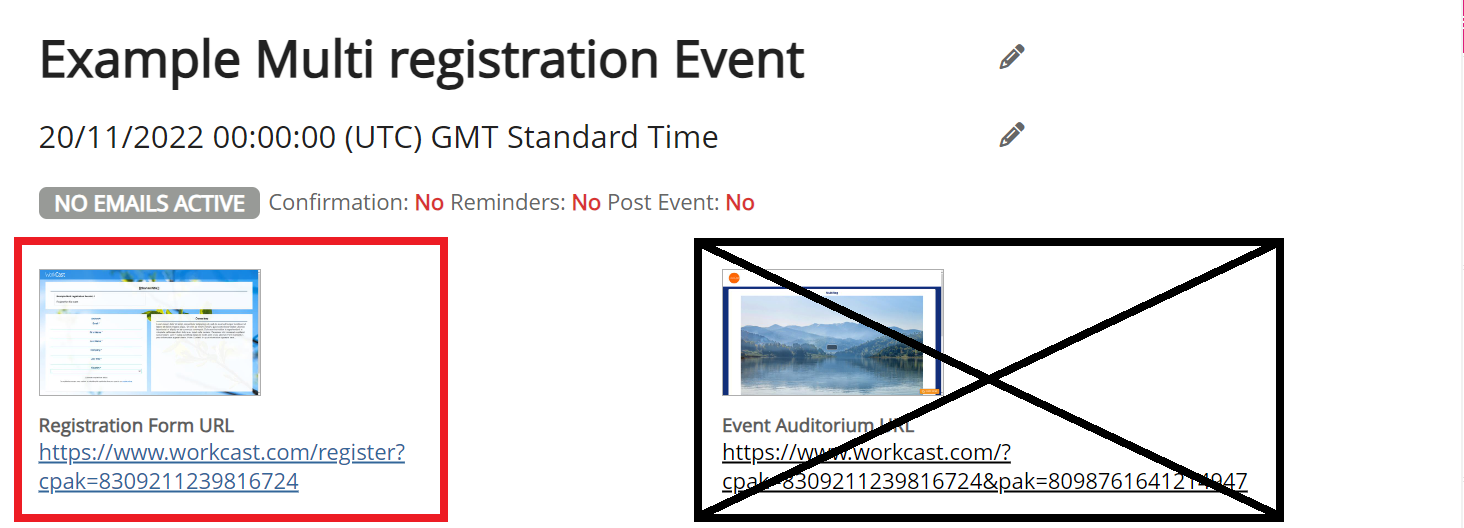
Note: The Event Auditorium URL will show as standard within the event however does not apply to any of your event sessions so should be ignored.
For multi-registration event reporting please click here