Customise the body of your attendee emails
Introducing the new and exciting customizable WorkCast attendee emails!
With our latest update, you can now personalise the content of the emails sent to your event attendees within WorkCast Creator. Whether you’re thanking them for registering, Reminding them the event is upcoming , or sharing follow-up content, each email can now be tailored to match your brand, tone, and event style easier than ever.
Each email type—Confirmation, Reminder, Post-Event Attended, and Post-Event Did Not Attend—has two unique 4000-character content boxes, giving you total freedom to craft unique messages for every stage of your event communication. Here’s what you can customize:
-
📝 Personalized Messages – Craft distinct messages for each stage of the attendee journey. Whether it’s a warm welcome or a follow-up for those who couldn’t attend, every email will feel thoughtful and relevant.
-
🌐 Custom Images and Hyperlinks – Add event-related images, logos, and clickable links that align perfectly with your brand and event. Direct attendees to important resources, registration pages, or post-event content with ease.
This feature does require the new and updated WorkCast attendee emails. Please reach out to your Account Manager for details.
How to edit
If the below content boxes are greyed out please click here.

Navigate to the Review Attendee Emails tab of your event and scroll down to the email you'd like to customise.
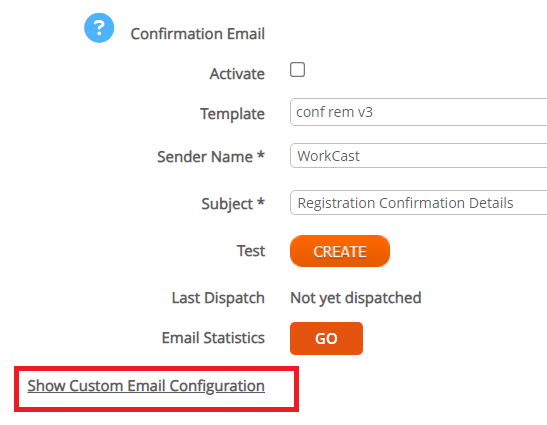
Click Show Custom Email Configuration
This will open up two content boxes ready for you to customise the body of your emails with additional text, hyperlinks or images.

Notes:
-
When copying and pasting from a Word document or alternative program you may see the below popup.

This indicates that there is hidden HTML code from these applications which can impact how the text appears on the Registration page. To remove this click Insert only Text.
You can then format your text using the WYSIWYG options within the content box.

Adding Images and Links to your Content
The fields can accept HTML code and there is also an editor built in to allow you to add images and links. To view a more detailed article on adding links and images to your webinar content please click here.

Once you've added in the content, scroll to the top of the Review Attendees email tab and Save.
You will need to do this before adding an email schedule, testing or activating your emails.
![workcast_logo_orange-01.png]](https://insite.workcast.com/hs-fs/hubfs/workcast_logo_orange-01.png?height=50&name=workcast_logo_orange-01.png)