Adding Links
Step 1
Add in your text within your content boxes as you normally would. Then, highlight your chosen word/sentence and click on the button that is in the screenshot below with the red box around it.
Note: When you hover over the different buttons, they will advise what they are for, for example when you hover over the one below ‘link’ appears.
 Step 2
Press the button, and a pop up will appear for you, this is where you paste in the URL you want the word/sentence to link to. You would also tick the Open in new tab – this means when somebody pressed the word that is linked on the live page, rather than taking them from the event page, it will open in a new window for them.
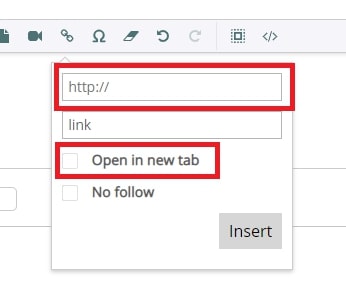
Then save and publish your draft and you are able to check that it works on your live page.
Adding Images
Important: Ensure the image you want to add is sized accordingly. For example, if this is an extra logo, the size needs to be 250 pixels in width. If it’s an image to go across the top of the registration page like a banner, this needs to be 1,200 pixels in width.
Ensure that the file name has no special characters and no spacing in the name. For example, rather than 'Example Image', change to 'exampleimage'.
If you wish to add an image to your live event registration or auditorium page, then please follow the below steps:
Step 1
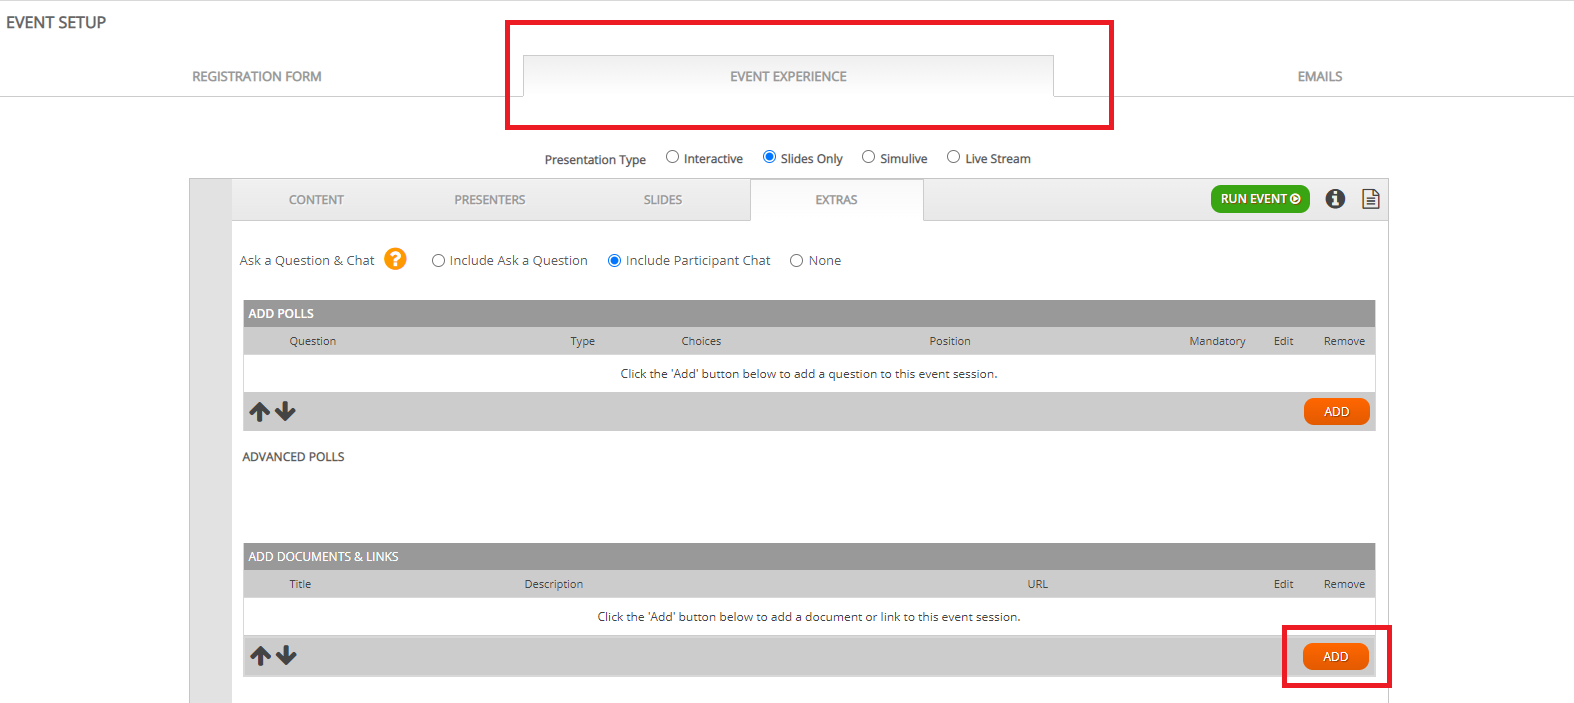
Go into the Event Experience and Extras tab, then to the Documents and Links section, and select ADD.
Note: Present+ users will not see the Emails tab within the below screenshot, but will see Registration Form and Event Experience.
Step 2
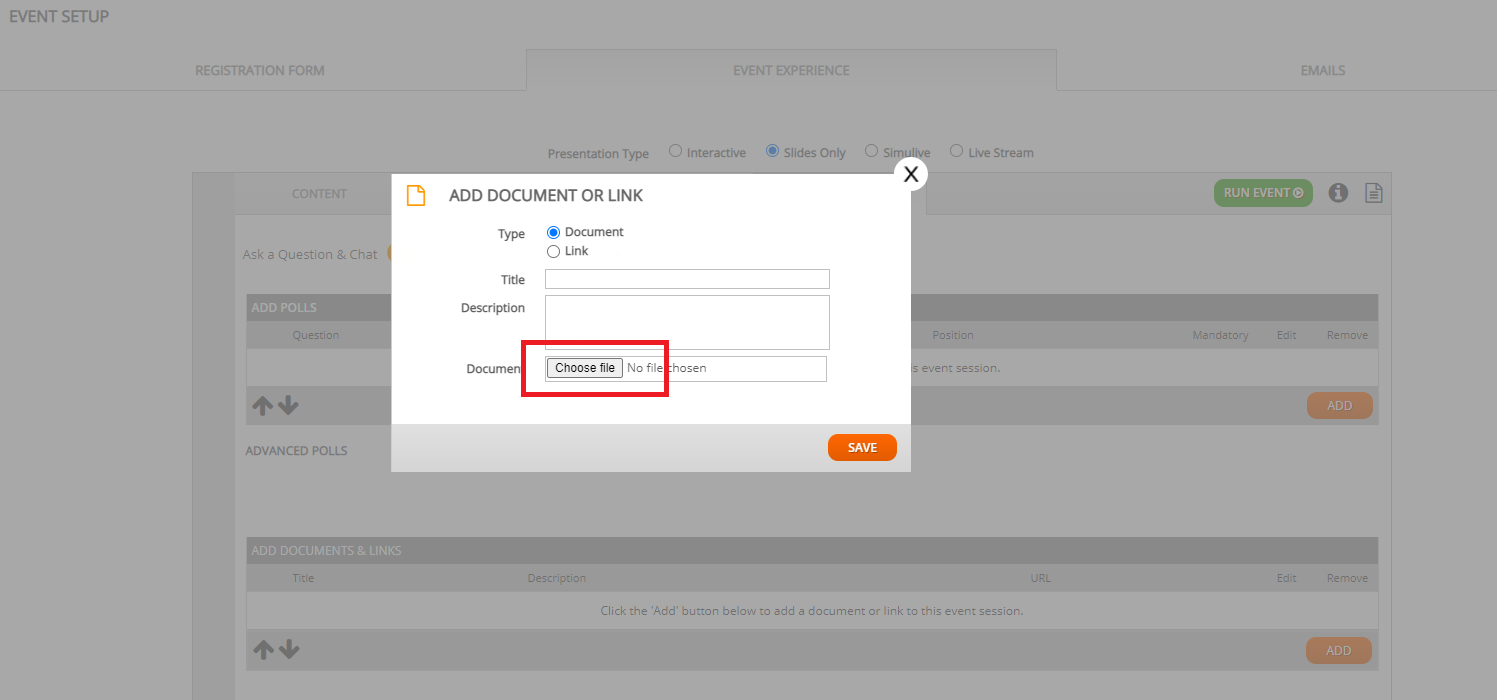
Once you have selected ADD, a pop up will appear for you, you need to then press Choose file, and then select the image you want.
Step 3
Once you have chosen your image, add a title, then select the orange save button. This will then generate a URL, it may take around 5 minutes for the URL to appear.

Step 4
Copy the URL, and go into the tab you want to add the content into (either Registration Form, or Event Experience and Content)
Once you are in your chosen tab, you then click into the content box, and your WYSIWYG will appear. Then select the Insert Image button.

Step 5
Once you have clicked on the button, a pop up will appear where you then paste the URL that you have copied from the Documents and Links section.
Once you have selected OK, you will see the image within the content box. Select save on the green bar, which will turn blue once selected. You can preview your page to ensure your image appears correctly.
You now need to remove the added image from the Document and Links section in the extra tab, if you leave it there it will show in the Resources tab on the live webinar page.