Quick Links
What is an On-Demand only event
How to create an On-Demand only event
Adding media to your On-Demand event
Adding Polls to your On-Demand event
What is an On-Demand only event?
An On-Demand only event is a WorkCast presentation type which allows you to create an event with full pre-recorded media (.mp4) and is available to view at a registrants convenience.
If you'd like to understand how to convert a Live event to On-Demand click here.
How to create an On-Demand only event
Within your account navigate to the Create Events tab, In the Live and Simulive section and scroll to the bottom of the template list.
Here you will see any On-Demand only versions of your Master Template identifiable by the words On-Demand only.
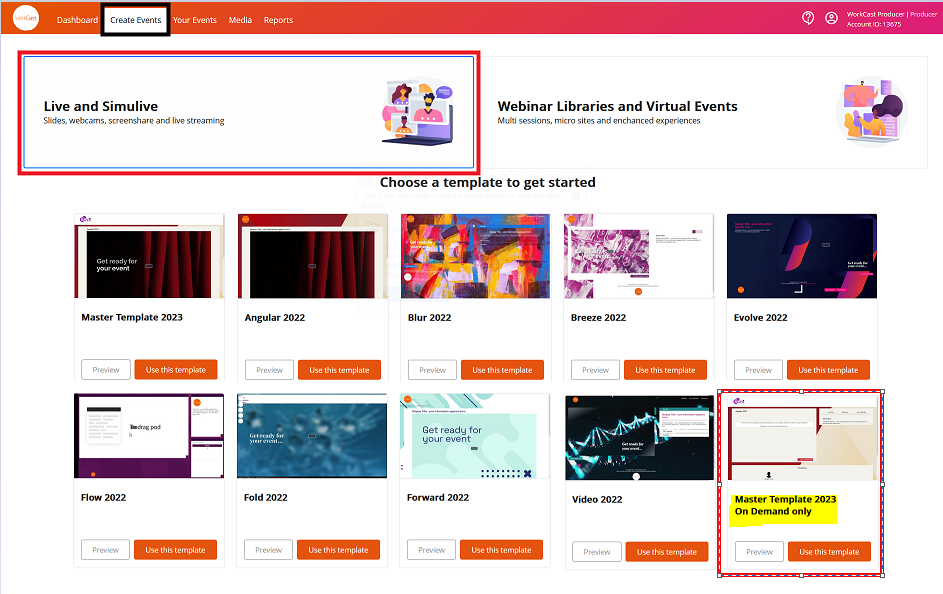
Click Use this Template and enter the event information into the Event Details page before confirming these on the event summary page and creating your event.
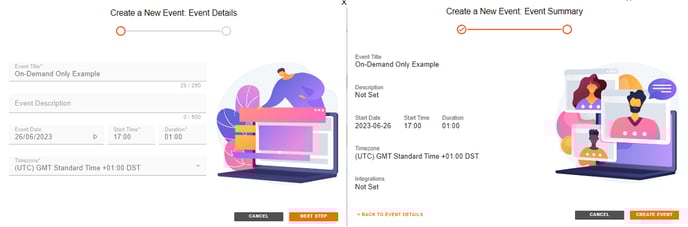
Please note: though the event will not be Live at any point, the date of the event should still be in the future.
When the event is created the page will reload to the below ready for you to add in your content.

For help adding content to your registration and auditorium pages and more please click here.
Adding media to your On Demand event
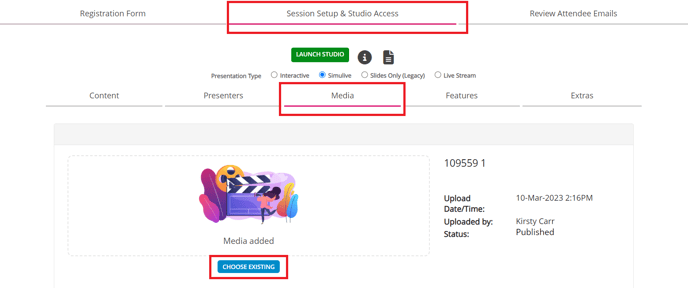
Note: To add media to a On-Demand only event you first need to upload this to the Media section of the account. To understand how to do this and the media requirements please click here.
Navigate to the Session Setup & Studio Access tab. In here select the Media tab and click Choose Existing
A pop up will appear where you are then able to search the account for the uploaded media. You can choose to enter the title or you can click the Search button which will show a list of all available media in the account to choose from.
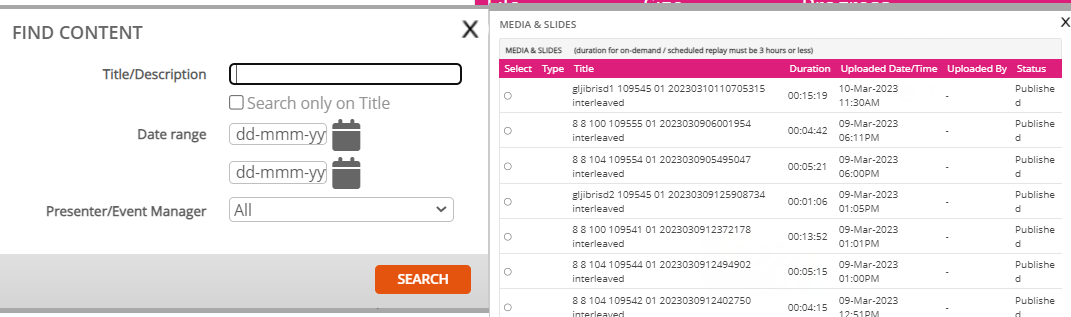
Click the checkbox to the left of the media you’d like to attach.
Adding Polls to your On-Demand event
Poll questions, when attached to a On-Demand event are automatically pushed to attendees at a specific time during the media playback. For this reason, poll questions are associated with the media attached to the event and not the overall event itself. Should you change the media attached to the On-Demand event you will need to re-add the poll questions into the event setup.
When adding polls to a On-Demand event you will see the below:
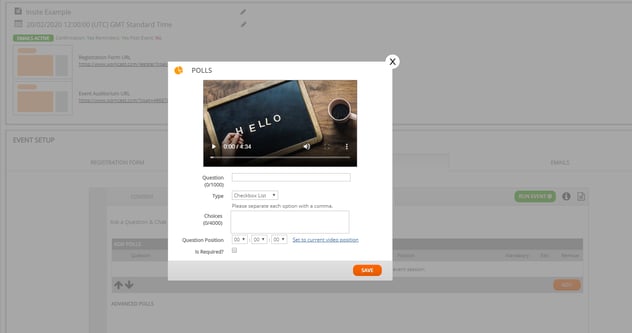
Once you’ve entered the question, type of question and added the answers to choose from you can then select where in the media the poll will push out to attendees. Once happy with the time click save.