Do you actually need to screen share to demonstrate your website or product?
Now, the combination of WorkCast and PowerPoint makes creating engaging product demos possible without specialist technology. Recordings can be embedded right into PowerPoint and then saved and used in webinars or saved as mp4 files and used to create On-Demand webinars.
Screen recording
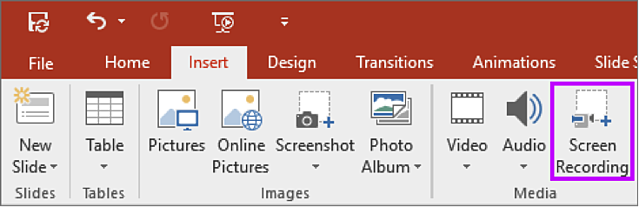
Perfect for demonstrations, you can now include screen recordings in your PowerPoint presentations with just a few clicks. Just set up whatever you'd like to record on your screen, then go to Insert > Screen recording, and you'll be able to select a portion of your screen to record, capture what you need, and insert it directly into your presentation in one seamless process.
You can record your computer screen and related audio, and then embed it into your PowerPoint 2013 slide ― or you can save it as a separate file.
NOTE: To record and listen to audio associated with your screen recording, you'll need a sound card, microphone, and speakers.
Make sure there's enough disk space on your local drive to record and save your screen recording.
Record your computer screen and embed it in PowerPoint
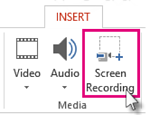
On the Insert tab, click Screen Recording.
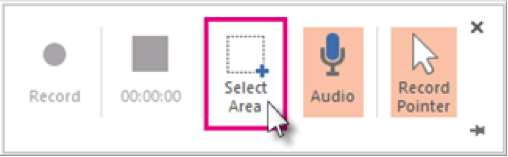
On the Control Dock, click Select Area.
NOTE: The minimum size area you can record is 64x64 pixels.
When you see the cross haired cursor, click and drag to select the area of the screen you want to record.
TIP: PowerPoint will automatically record the audio and the pointer. To turn them off, deselect Audio and Record Pointer.
Click Record
TIP: Unless you pin the Control Dock to the screen, it will slide up into the margin while you record. To access an unpinned Control Dock while recording, place the cursor at the top of the screen.
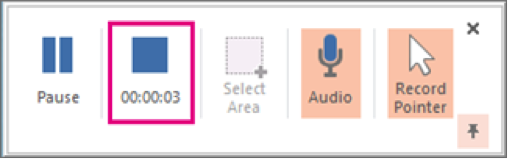
To control your recording:
- Click Pause to temporarily stop the recording.
- Click Record to resume recording.
- Click Stop to end your recording (shown below).
On the File tab, click Save, choose a folder, and in the File name box, type a name.
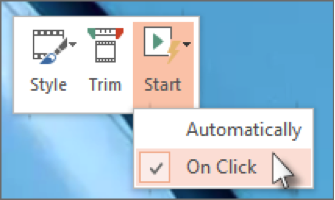
Set your video Start settings
Right-click the video frame, click Start and pick how you want your video to start in your presentation; automatically when a slide appears, or when you click the mouse.
Trim your video
Right-click the video frame, and click Trim.
To determine where you want to trim your video footage, in the Trim Video box, click Play.
When you reach the point where you want to make the cut, click Pause.
TIP: Use the Next Frame and Previous Frame buttons to specify precise timing.
Do one or more of the following:
To trim the beginning of the clip, click the start point (shown in the image below as a green marker). When you see the two-headed arrow, drag the arrow to the desired starting position for the video.
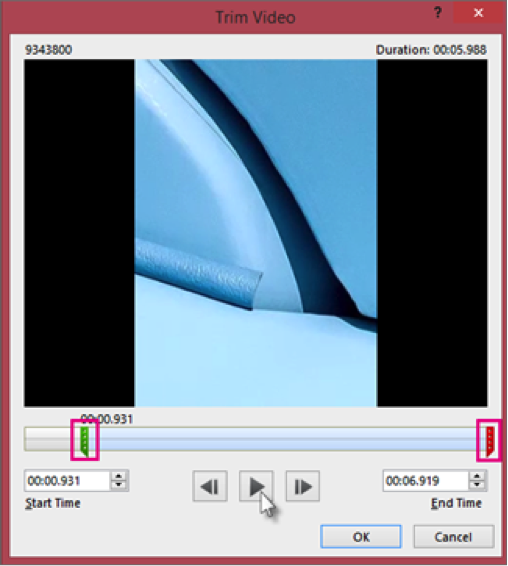
To trim the end of the clip, click the endpoint (shown in the image above as a red marker). When you see the two-headed arrow, drag the arrow to the desired ending position for the video.
Click OK.
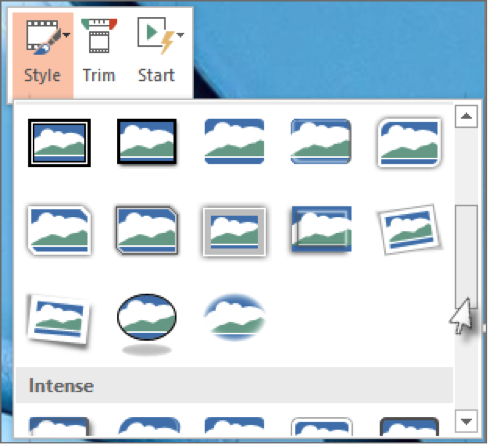
Apply a style to the video frame
Right-click the video frame, click Style, and pick a style you like.