Marketo Registration Forms
Marketo Registration Form data can be configured to push to the WorkCast Platform via a Webhook.
Marketo Campaigns can be used to push registration data into the WorkCast Platform. This is done by means of a Webhook which does an HTML POST to the WorkCast Data Usher interface.
The following sections describe how the Webhook and the Campaign should be configured in order to push the data to WorkCast.
Webhook
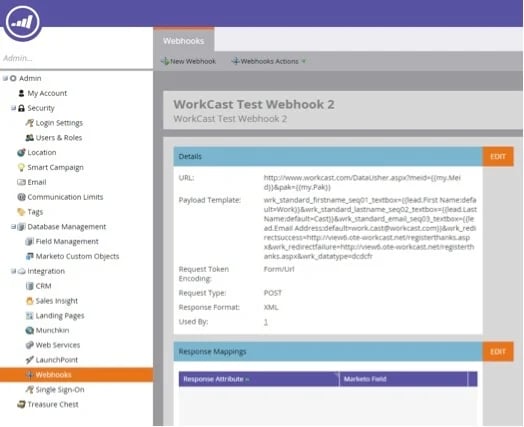
A new Webhook can be created in the Marketo Interface using the Webhook option in the Admin -> Integration Menu.
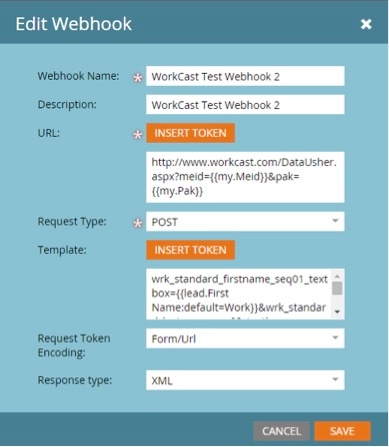
A new Webhook should be configured using the Edit Webhook popup shown on the next page:
Webhook Name
This can be as desired.
Description
This can be as desired.
URL
The URL should be set to point to the WorkCast Data Usher endpoint and include query string parameters for the Meid and Pak values for the Event Session against which the client will be registered.
Example URL:
https://www.workcast.com/DataUsher.aspx?meid=&pak=
The endpoint (e.g. https://www.workcast.com/DataUsher.aspx) will vary if you have URL masking configured on your account. Please change the https://www.workcast.com section to match your URL mask.
The Meid (Managed Event Id) and Pak (Public Access Code) values can be found in the Event Session Summary section of the WorkCast Platform. The Pak is shown at the end of the Form URL value.
We have used Program / Event level Tokens so that the same Webhook can be used for multiple Event Sessions. Setting up the required Tokens is detailed in a later section of the document.
Request Type
This should be set to POST.
Request Token Encoding
This should be set to Form/URL.
Response Type
This should be set to XML.
Template
Example
wrk_standard_firstname_seq01_textbox=&wrk_standard_lastname_seq02_textbox=&wrk_standard_email_seq03_textbox=&wrk_redirectsuccess=https://www.workcast.com/registerthanks.aspx&wrk_redirectfailure=https://www.workcast.com/registerthanks.aspx&wrk_datatype=dcdcfr
NOTE: Do not copy and paste the above example code. The Tokens (e.g. ) must be entered in to the template using the INSERT TOKEN button. Failure to do this will result in the default field values always being sent to WorkCast.
In the above example, the default values for First Name, Last Name, and Email Address can be changed to your liking.
Please change the https://www.workcast.com sections in the above example for the wrk_redirectsuccess and wrk_redirectfailure fields to match your URL mask.
The example above only includes the 3 mandatory fields required by the WorkCast Platform in order for a registration to be processed. Additional standard and custom registration fields can also be sent through the WorkCast Data Usher if required. The additional fields and data would then be available in the WorkCast Platform registration reports. The additional fields must conform to the standard Data Usher field naming conventions.
Examples
wrk_standard_phone1_seq04_textbox
wrk_standard_addressline1_seq05_textbox
wrk_custom_interestedinlearning_seq06_dropdownlist
Please refer to the WorkCast Integration Data Capture Forms document for information on the fields that can be included and how they should be named.
Tokens
Program/Event level Tokens can be added from the My Tokens screen:
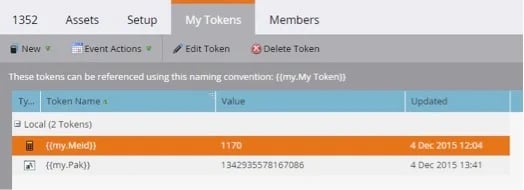
Using Program/Event level Tokens means that the same Webhook can be used for multiple Event Sessions.
Form
- Create a new Form in Marketo Design Studio:

- New Form:
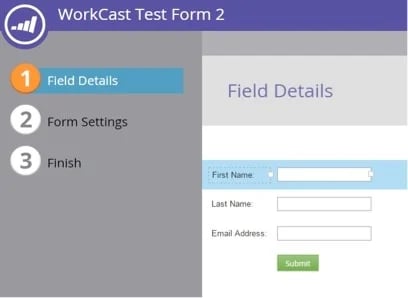
Default settings which include the following fields are sufficient to push the data to the Data Usher:
- First Name
- Last Name
- Email Address
You can of course add any additional fields you would like to the form.
Landing Page
- Add a new Landing Page from the same Design Studio menu as above using any template you wish.
- Edit the new Landing Page and add the Form you created in the previous step.
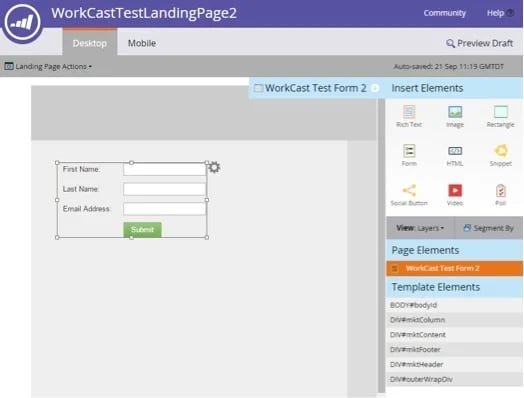
- Approve and Close the Landing Page via the Landing Page Actions menu in the top left.
Campaign
You now need to create a Campaign to link the filling out of your form with the firing of the Webhook.
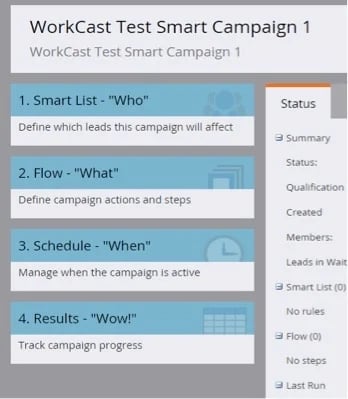
- Create a new Smart Campaign from the Marketing Activities -> New Menu.
- You need to define steps:
- Smart List - Who
- Flow - What
- Schedule - When
In order for the Webhook to fire when the Form is completed.
Smart List - "Who"
Add a Fills Out Form Trigger from the right-hand list and point it to the Form you created.

Flow - "What"
Add the Webhook you created to this step.
.webp?width=524&name=Flow_Webhook%20(1).webp)
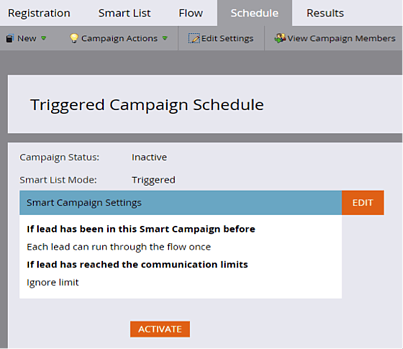
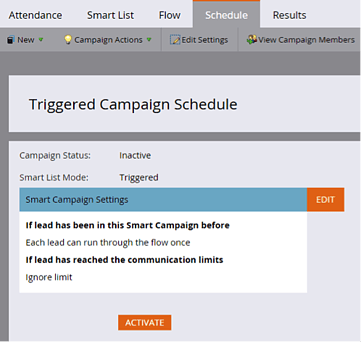
Schedule - "When"
Configure the Schedule as you wish and then Activate the Campaign.

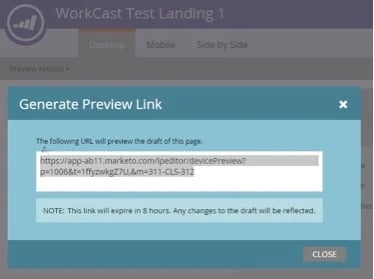
The above can be tested using the Landing Page Preview -> Preview Actions -> Generate Preview Link URL. Pasting this URL into a browser, filling in, and Submitting the Form will result in the details being registered for the WorkCast Event in question.
Attendance & Registration Data
Event Registration, Attendance, or Non-Attendance information can be pushed from the WorkCast Platform via the WorkCast Marketo Integration Service. If you are using your own Marketo form you may just require the event attendance data.
The following steps need to be performed in Marketo in order for the WorkCast Marketo Service to be able to push Webinar Registration and Attendance data.
Admin
1. The first step is to create a new API Role.
This Role must have the following 3 permissions as an absolute minimum:
- Execute Campaign
- Read-Write Lead (or Read-Write Person depending on your Marketo version)
- Read-Write Campaign
2. Next, you need to create an API User.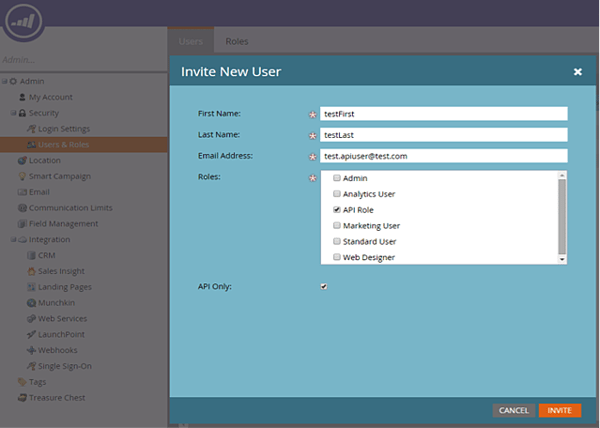
3. Create a WorkCast API Service
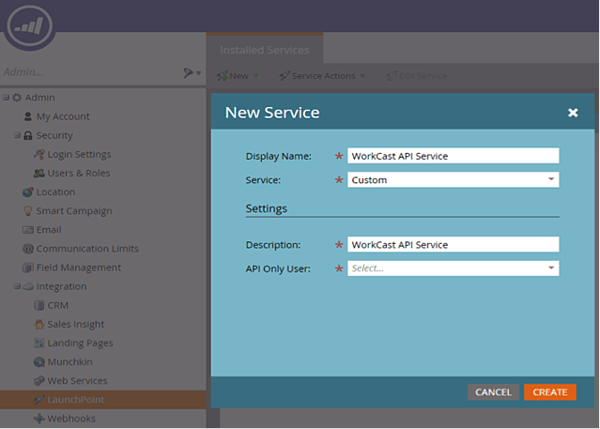
Select a Service Type of Custom and select the API User created in Step 2 as the API Only User.
Please make a note of the following values, these will be entered within the WorkCast Platform to access the Marketo Account:
- REST API Endpoint (Web Services)
- Client Id (LaunchPoint)
- Client Secret (LaunchPoint)
Marketing Activities
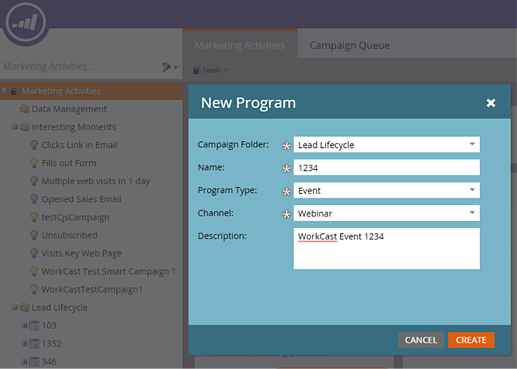
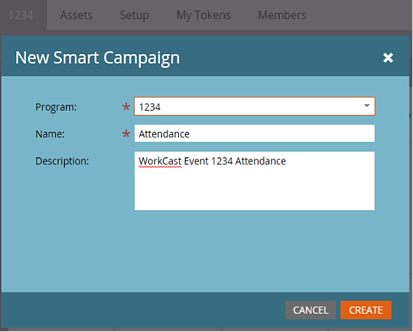
1. Create a new Event of Program Type – Event and Channel – Webinar.
The Event Name MUST be the same as the WorkCast Event Session Id. If you are unsure of your event session ID please request this from support@workcast.com.
Create a Registration Child Campaign
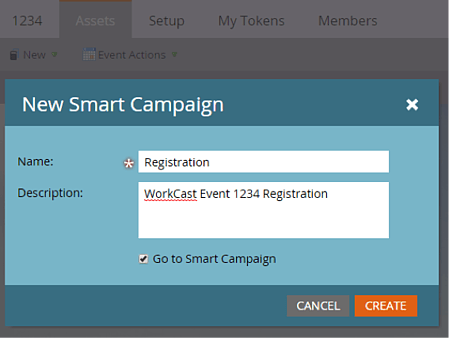
This MUST be called “Registration”.
2. Setup the Campaign Smart List
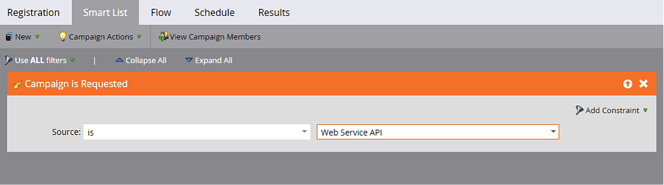
Use a Campaign is Requested Trigger set to Web Service API.
3. Setup the Campaign Flow
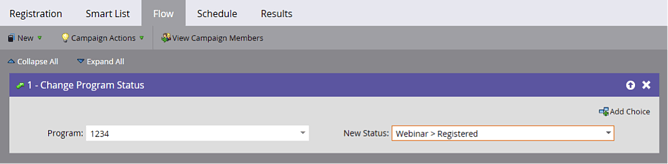
Use a Change Program Status Action and set it to Webinar -> Registered.
4. Activate the Child Campaign
5. Create an Attendance Child Campaign
This MUST be called Attendance.
6. Setup the Campaign Smart List
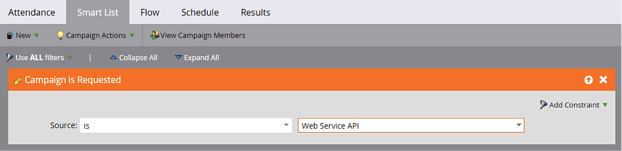
Use a Campaign is Requested Trigger set to Web Service API.
7. Setup the Campaign Flow
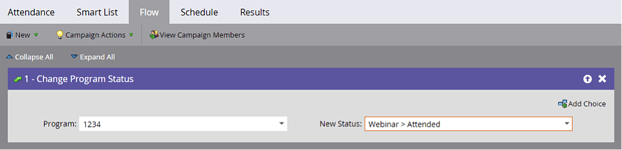
Use a Change Program Status Action and set it to Webinar -> Attended.
8. Activate the Child Campaign
The most important parts of the above process are that the Event is named with the WorkCast Event Session Number and that the two Event Child Campaigns are called Registration and Attendance.
WorkCast Service Operation
The WorkCast Marketo Integration Service runs at scheduled intervals on one of the WorkCast servers.
Registration and Attendance data for all configured accounts and events are retrieved from the WorkCast Data Warehouse database.
Live data is shipped to the Data Warehouse on a 15-minute cycle. This in effect means that any new data will be pushed to the client's Marketo account in under an hour.
During each cycle the service performs the following sequence of tasks for each configured client account:
- Get the date and time of the last data record read from the WorkCast database.
- Update the current state of the process for this account in the database to ‘Processing’. Include the last processed date time in this record.
- Get the Marketo Host, Id, and Secret for this account from the WorkCast database.
- Login to the Marketo API
- Get a list of email filter strings from the WorkCast database. If any new Lead Email addresses contain any of these filter strings then they will not be created in Marketo.
- Retry any failed Marketo API operations from previous runs. This process is described in greater detail in another section of this document.
- Get all the WorkCast Events that have been configured to be pushed to Marketo.
- For each configured WorkCast Event the service performs the following tasks:
- Get all new Registration Data for that Event.
- Get all new Attendance Data for that Event.
- Reject all potential Leads that contain filter strings in their email addresses.
- Populate an outbound data structure for each Registration and Attendance.
- Process each Lead Record.
- If the Email Address exists as a Lead in Marketo, update it with any modified Lead fields and enroll the Lead in the correct Event Registration / Attendance campaign.
- If the Lead does not currently exist in Marketo, create a new Lead record, populate the Lead fields, and enroll the Lead in the correct Event Registration / Attendance campaign.
- If any of the Reads, Updates, or Creates in the above 2 steps fail, then add a new Retry record to the WorkCast database. Retry processing is detailed further in the next section.
- Increment the number of Successful or Failed records.
- Update the current state of the process for this account in the database to Pending. Logout from the Marketo API
Retry Processing
At the start of each service cycle, it checks to see if there are any failed Lead or Activity Updates or Creates that failed during previous runs.
If there are, then the service takes the first 50 records (oldest first) for that account and attempts to reprocess them.
Each of the Retry records is basically a serialized JSON representation of the Lead or Activity wrapped with some required processing data. The wrapper includes the Type, Operation, and remaining number of retries of the failed transaction.
Each Marketo API operation will be tried 5 times. If they have not succeeded after 5 attempts it can safely be assumed that they are fundamentally flawed and will never succeed. They will remain in the Retry database table with a remaining number of retries of 0 so that they can be picked up by WorkCast Support and investigated.
After each processing attempt, the number of remaining retries is decremented. If the processing attempt succeeded then the Retry record is deleted from the database.