Clients of WorkCast Business, Business Pro and Enterprise plans have the option to integrate with their Eloqua marketing system.
![]()
-
Eloqua Registration Forms
-
Landing Pages
-
Campaigns
-
Testing
-
Attendance Data
Eloqua Registration Forms
Eloqua Registration Form data can be configured to push to the WorkCast Platform via a Form Post.
Select the Forms option from the Assets Menu and then select Create a Form.

Select the Template you wish to use for the Form.
This will generate a basic form.
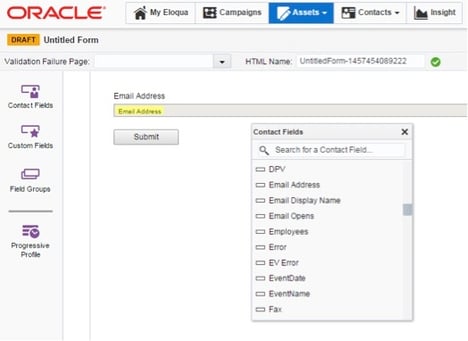
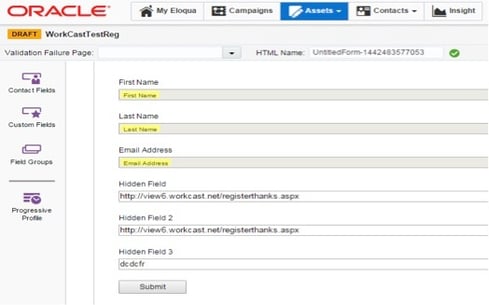
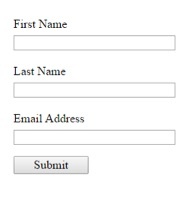
Add the following Contact fields to your form by selecting them from the Contact Fields table:
First Name
Last Name
Email Address
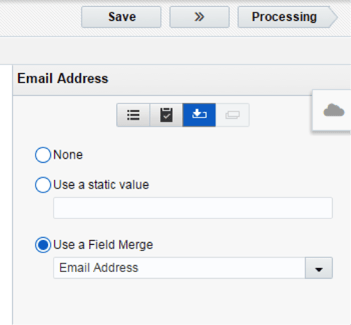
Ensure that these fields are set up to Use a Field Merge:-
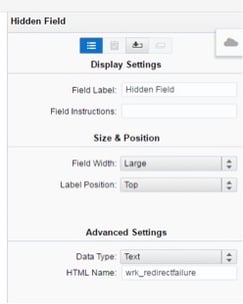
Also, add 3 Hidden Fields (from the Custom Fields list):
wrk_redirectsuccess
wrk_redirectfailure
wrk_datatype
Ensure that each of these fields has the correct HTML Name value:-
Use the Pre-Population button (third from the left) on the Hidden Field Properties panel to set a static value for the 3 Hidden Fields. These should be set as follows:
**Examples**
wrk_redirectsuccess = https://www.workcast.com/registerthanks.aspx
wrk_redirectfailure = https://www.workcast.com/registerthanks.aspx
wrk_datatype = dcdcfr
Please change the https://www.workcast.com sections in the above example for the wrk_redirectsuccess and wrk_redirectfailure fields to match your URL mask.
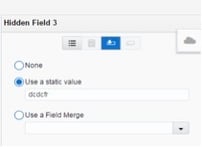
Please note: the active option is shown with a light blue background.
You should have a form that looks similar to the one pictured below.
Save your new Form using the Save button at the top right of the screen.
Move on to the next screen using the Processing button.
Remove any existing Processing Steps by right-clicking on them and selecting Remove Step.
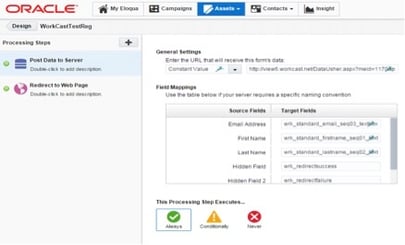
Add a new Post Data to Server Processing Step.
The General Settings should be configured with the following options:-
URL
The URL should be set as a Constant Value to point to the WorkCast Data Usher endpoint and include query string parameters for the Meid and Pak values for the Event Session against which the client will be registered.
**Example URL**
https://www.workcast.com/DataUsher.aspx?meid=1234&pak=1234567890123456
The meid in the URL should be set to the WorkCast Managed Event Id.
The pak in the URL should be set to the pak code of the WorkCast Event.
The endpoint (e.g. https://www.workcast.com/DataUsher.aspx) will vary if you have URL masking configured on your account. Please change the https://www.workcast.com section to match your URL mask.
The Meid (Managed Event Id) and Pak (Public Access Code) values can be found in the Event Session Summary section of the WorkCast Platform. The Pak is shown at the end of the Form URL value.
Field Mappings
The Field Mappings should be set as follows:
|
Source Fields |
Target Fields |
|
First Name |
wrk_standard_firstname_seq01_textbox |
|
Last Name |
wrk_standard_lastname_seq02_textbox |
|
Email Address |
wrk_standard_email_seq03_textbox |
|
Hidden Field |
wrk_redirectsuccess |
|
Hidden Field 2 |
wrk_redirectfailure |
|
Hidden Field 3 |
wrk_datatype |
A full set of the standard fields that can be used can be found in the WorkCast Integration Data Capture Forms document.
Custom fields can also be added and pushed to the WorkCast Platform. Again, details of how this can be done can be found in the WorkCast Integration Data Capture Forms document.
Set the This Processing Step Executes… to Always.
You should now have a screen similar to the one shown below:-
Add a new Redirect to Web Page Processing Step.
This should be configured with the following options:-
Send to an External URL
Always redirect to the same URL
Set this to a Thanks Page URL of your choice.

Save the Form with a suitable name.
Landing Pages
Select the Landing Pages option from the Assets Menu and then select Create a Landing Page.
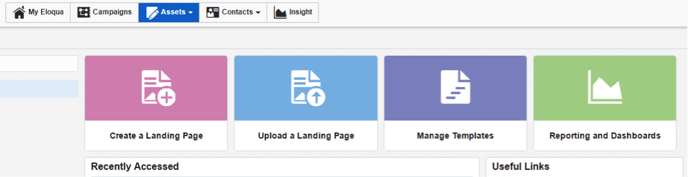
Select the Template you wish to use for the Landing Page. This will generate a basic empty Landing Page.
Add the Form created above to a Landing Page by clicking on the Form option in the left-hand column and then selecting and dragging the required Form from the Form Browser List.
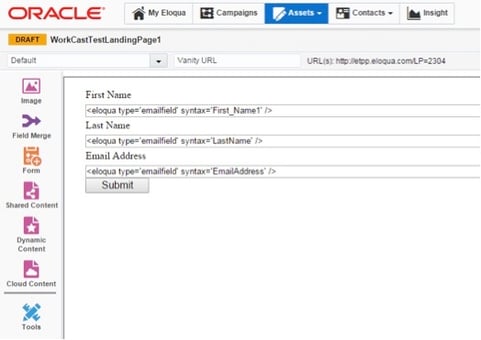
Save your Landing Page with an appropriate name.
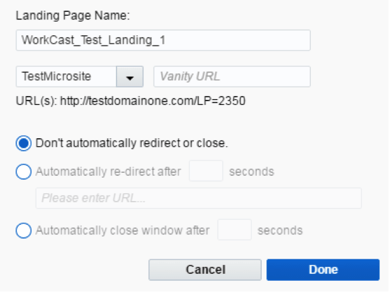
Supply a Microsite for the Landing Page by clicking on the DRAFT button at the top left of your screen.
And then select your required microsite:
Save your Landing Page again.
Campaigns
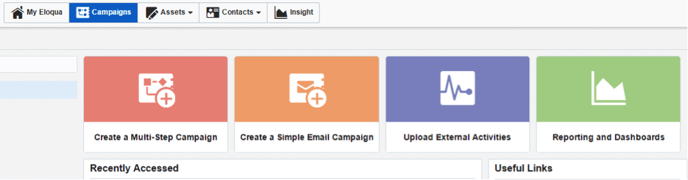
Select the Campaigns Menu and then select Create a Multi-Step Campaign.
Select the Template you wish to use for the Campaign. This will generate a basic empty Campaign.
Add a Landing Page Step to your Campaign.
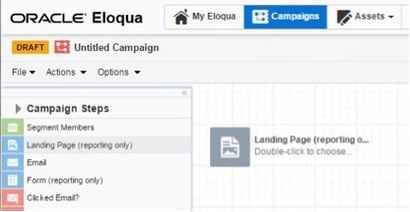
Double click the element on the page and then select the Landing Page you created in the previous section.
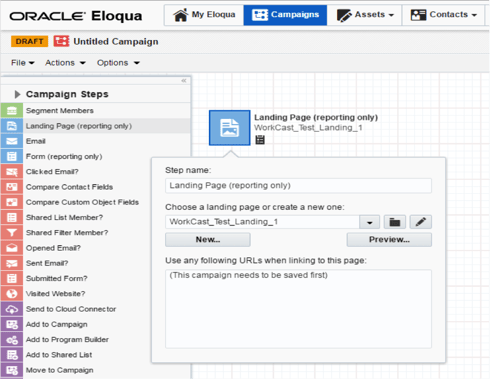
Save your Campaign with an appropriate name.
Activate your new Campaign using the Activate… button in the top right of the screen.

Your Campaign, Landing Page, and Form will now show as being Active.
Testing
The Landing Page and the Form can then be tested using the link in the URL(s) field on the top bar of the Landing Page screen and then clicking the link that appears in the popup.

Your Form will then be displayed.
Pressing Submit on the Form will push the Registration Data to WorkCast and add the Registrant to the configured WorkCast Event.
The user will then be redirected to the page you configured in the Redirect to Web Page step above.
The Registration should then be seen in the WorkCast Platform Registration Report.
Attendance Data
Event Attendance information can be pushed from the WorkCast Platform via the WorkCast Eloqua Integration Service. This Attendance information can include Poll, Chat, and Documentation link data. To configure attendance data you will need to connect your Eloqua account to the WorkCast Integration page.